Setting Up Notifications
Notifications
SIMS ID allows you to select an email that will receive various notifications from SIMS ID. These notification are centred on security and service events such as unauthorised access attempts. They are not and will not be used for marketing. Your details will never be shared.
Alerts
The only notifications that SIMS ID will currently send are for suspicious log in activities using your SIMS ID account
SIMS ID recognises where you normally log in from, (country) and the device(s) you normally use, if a new login event from an unrecognised device or a country you are not normally in SIMS ID will inform of this login as it may be suspicious or could be legitimate (eg you are accessing your email while on holiday) SIMS ID will inform you of these events. This is industry best practice and similar functionality to other providers such as Google, Microsoft and many banks.
Setting Up where Notifications should be sent to
In order to receive notifications, you will need to confirm the mail address that you wish notifications to be sent to.
To access your profile start by clicking on the down arrow to the right of your username (top right of screen) and selecting “My profile”.
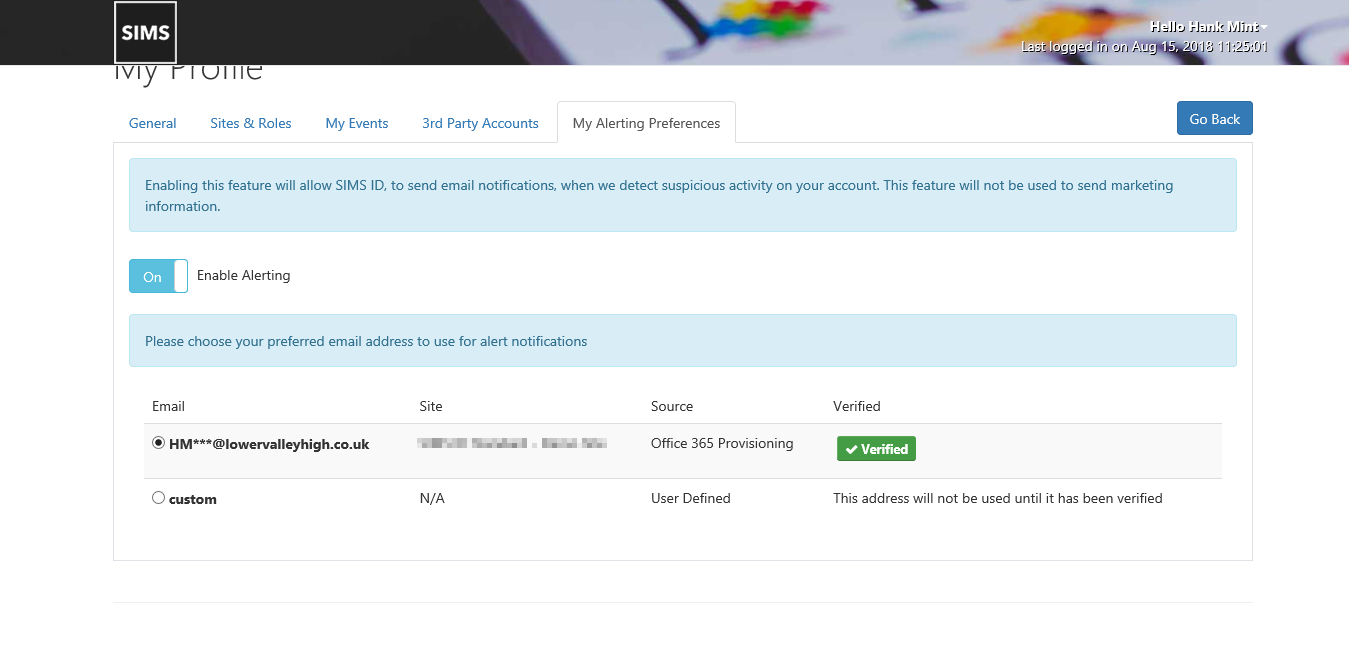
Click on the My Alerting Preferences tab which will bring you to the notification page
The alert notification page contains a table that shows all of your currently stored emails that can be used for notifications. These emails are those that are provisioned by SIMS ID, imported from the MIS or manually added by you. For privacy reasons, the whole mail address is not shown with astrixes replacing a number of characters of the Address.
Enable and disable alerts
Enabling the notification service is done simply by turning on or off the feature with the Enable Alert Switch
To disable alerts simply turn off the service with the Enable Alert switch

Verifying an Email
Some emails will automatically be verified and can be used straight away, these are Office 365 and Google emails that have been provisioned by SIMS ID
Any other type of email that is stored by or added to SIMS ID will require verification.
In order to enable a custom email you will need to select the custom email option within the table and then enter your email into the field shown

Upon selecting one of the stored unverified emails or entered a new email a verification message will be sent to that mail address. This verification mail contains a code needed to verify this email.
using the automated verification email link
You can verify the email by clicking on the link within the mail. If you are not logged into SIMS ID you will be required to log in). You will then be taken notification page where you will see that you mail has been verified
verifying a mail address by entering a code
If you are having problems clicking on the link within the validation email to validate your email address then you can enter the code manually. Please click on the second link in the received email, this will take you to a page that will require you to enter the verification code from the mail
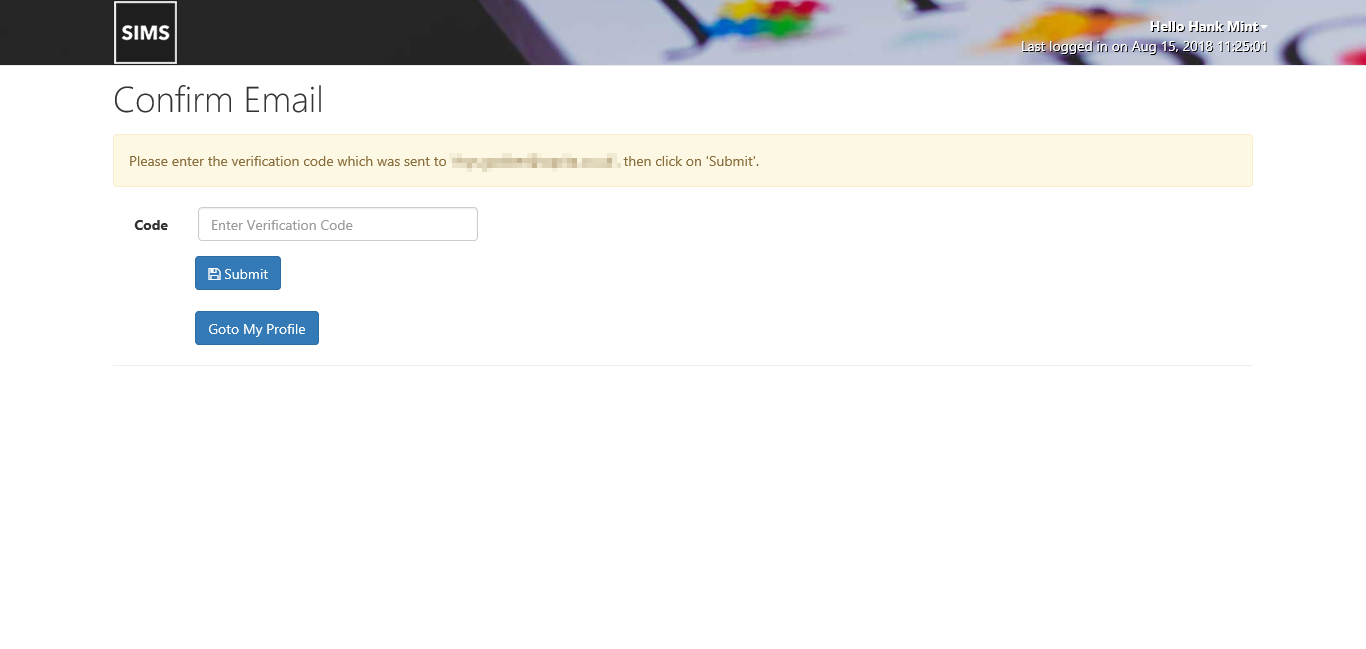
Once you have entered the code click on the "verify" button this take you to the notification page where you will see that you mail has been verified
If you do not receive your verification email or the verification code has expired you can request another verification code using the "Resend Notification Email" button. This will send a new verification mail that contains a new verification code and use this code to verify the email. Any previous codes are invalidated.

If you try to use an invalidated code they system will inform you that "The code you have entered was issued to you, but has been superseded by a later verification request which was sent to ....'
changing a custom address.
If you have entered a custom mail address and wish to change it. Please type the new address in the custom address field and press enter. The new address will now display and show as unverified. Once verified this mail address will start to recieve notifications.
Alerts are now configured
Once you have selected a verified email to be used you will now start to revive alerts from SIMS ID whenever there is potentially suspicious login activity regarding your account.