Tilestore Overview
- 1. Using the Tile Store
- 2. Accessing the Tile Store
- 3. The Tile Store Interface
- 4. Video Overview
4. The5. The Available Tiles screen5. Available6. Available Tiles Screen Actions6. Available7. Available Applications Screen Actions.
Using the Tile Store
The SIMS ID Tile Store allows you to:
- Create custom tiles for your site.
Access centrally provided tiles including:
- tiles made available to all schools
- third-party Single Sign-On applications
- third party Applications that exchange data with SIMS.
- Audience these tiles so that they are available on the launch pad for all users, groups of users or even specific individuals.
Accessing the Tile Store
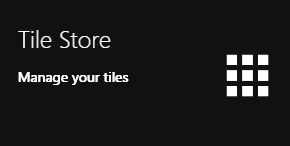
The Tile Store is accessible via the Tile Store tile on the Launcher Page of SIMS ID. Only admin users will have access to this tile.
If you have admin access to more than one site, when you access the tile store you will be taken to your primary sites Tile store first, if you want to change sites click on the "Change Site" button at the top or the page and a list of available sites will open within the page allowing you to select the site you wish to manage.
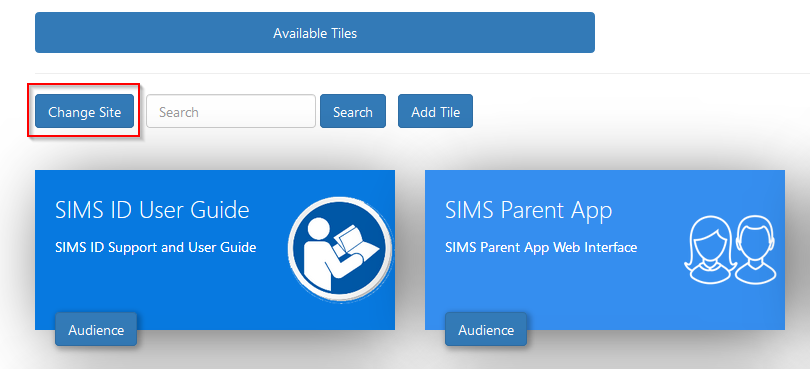
A search facility is available on the Tile Store screen to help quickly locate tiles you are looking for.
The Tile Store Interface
The Tile Store is split into two sections.

Available Tiles and Available Applications
Video Overview
The Available Tiles screen
Available Tiles contains:
- Tiles that have been created at your site
- Tiles that are centrally available such as links to the DfE or Welsh Government Education Sites
- Applications that have been installed from Available Applications.
Available Tiles Screen Actions
Adding a New Tile to the Tile Store
As a site admin, you have the ability to create your own tiles that will only be visible in the Tile Store at the site you create them in.
To add a new tile,
Access the Tile Store from the Launcher page
Choose a site to manage (if applicable)
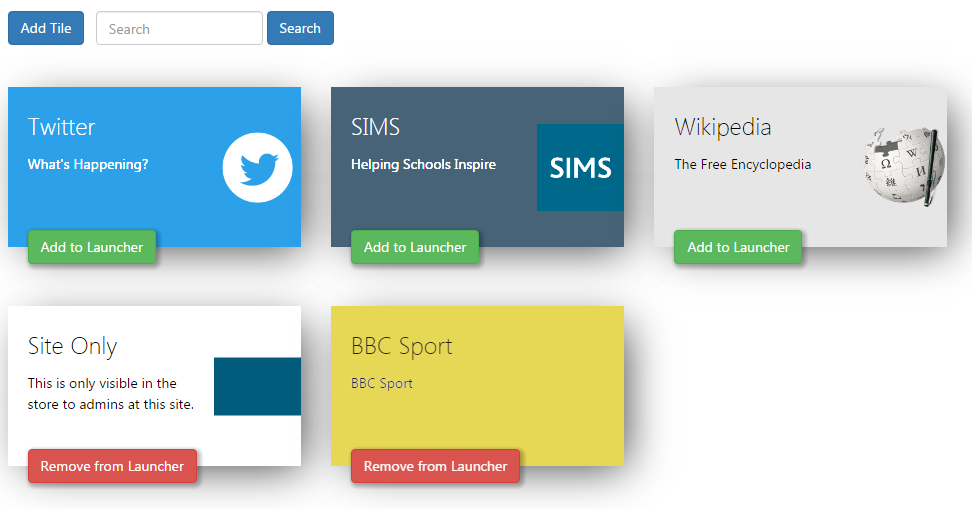
Click the Add Tile button
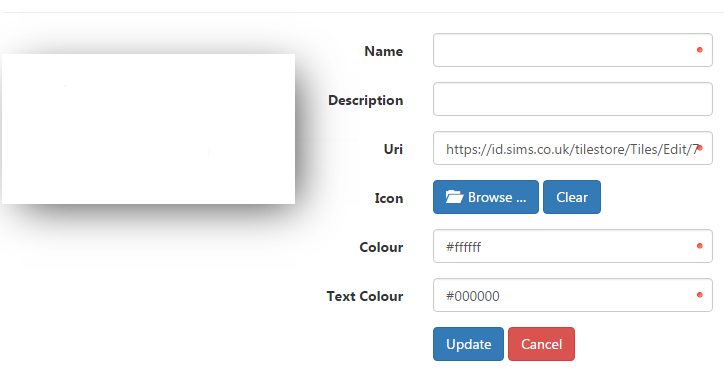
You will now see the Add New Tile page
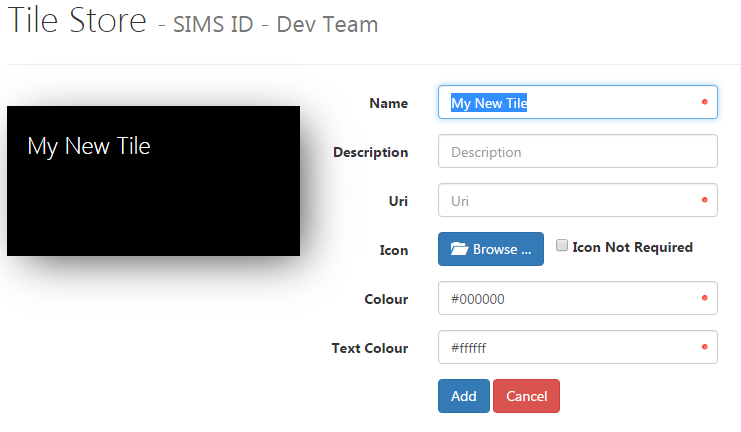
Enter a Name for you tile
Enter a Description for your tile (optional)
Enter the URL that will load when your user’s click the tile e.g. http://www.bbc.co.uk
(Optional) Click the Browse button to add a picture to your tile. PNG, JPEG and GIF files are supported. If you do NOT want an icon tick the Icon Not Required checkbox
Click the Colour textbox and a colour picker will appear allowing you to change the background colour of your tile (you can also, type the name of a colour e.g ‘yellow’ or colour code into this box)
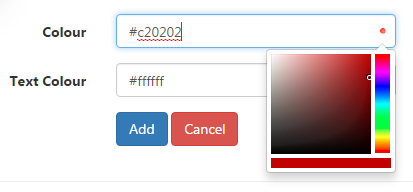
Click the Text Colour textbox to change the text colour
When you are happy with the look and feel of your tile simply click the Add button
Your new tile will now appear in the Available Tiles screen (for the site you are managing).
Editing and deleting your tiles
You are able to edit and delete the tiles that are created at your site.
Deleting a tile
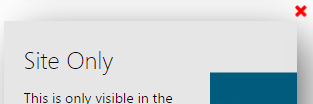
To remove a tile that has been created at your site access the Tile Store, Locate the tile and click the Remove from Launcher button to De-Audience it. You can now delete the tile.
Hover the mouse over the tile
Click the red X that appears in the top right corner
 >
>
NOTE! If you are using a mobile device you can swipe left or right on a tile to delete it
- A dialog will appear asking you to confirm you want to delete the tile
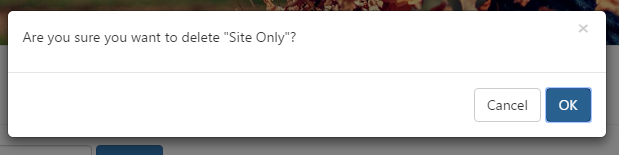
- Click OK and the tile will be deleted.
Editing a tile.
To edit one of your tiles:
Simply click on the tile (on mobiles you may have to tap twice)
You will be taken to the Edit Tile Page
The page operates exactly as the Add New Tile page (see above)
Make any desired changes and click Update to save
Your changes will immediately be visible, both in the Tile Store and on your user’s Launcher pages (if you had previously added it).
Audiencing a tile
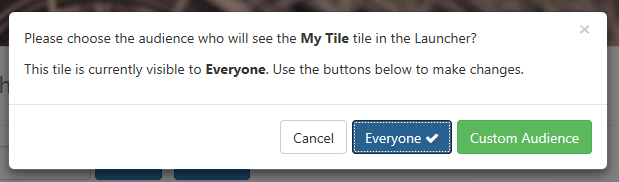
Tiles that are available for advancing will have a blue Audience button on them. This button allows you to add the tile to the Launcher page of selected users or even all users at the sites.
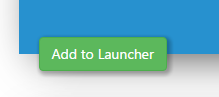
When you click “Add to Launcher” you will be asked who you want the tile visible to.
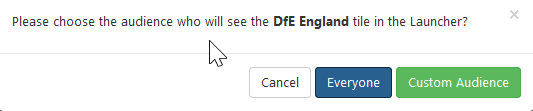
You can choose Everyone to make the tile visible to everyone at the site.
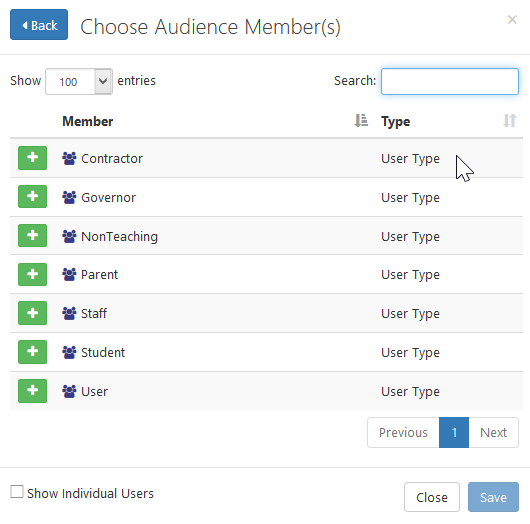
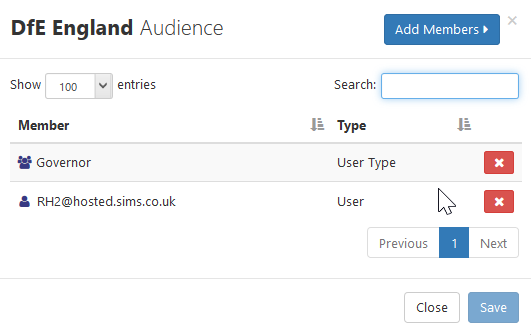
Clicking Custom Audience allows you to be more selective and opens up a selector where you can grant access to the tile to:
Site roles or groups that are either pulled through from SIMS or managed in SIMS ID.
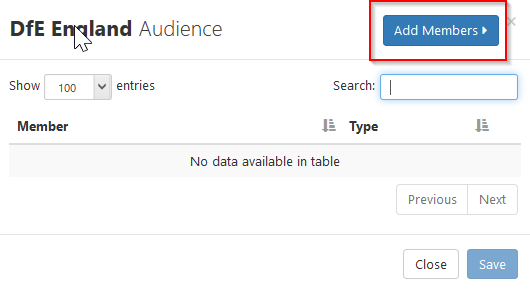
Click “Add Members” to display the available groups.
Clicking the + adds this group. The group then disappears from the available list.
If you want to add individual users, you can tick the “Show individual Users” checkbox
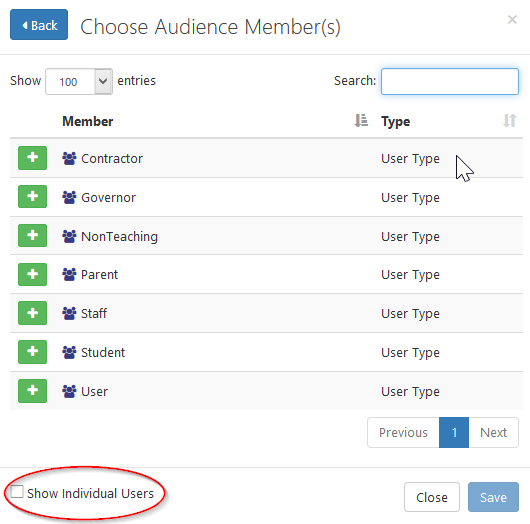
The display will then show individual users that can be added in the same way.
<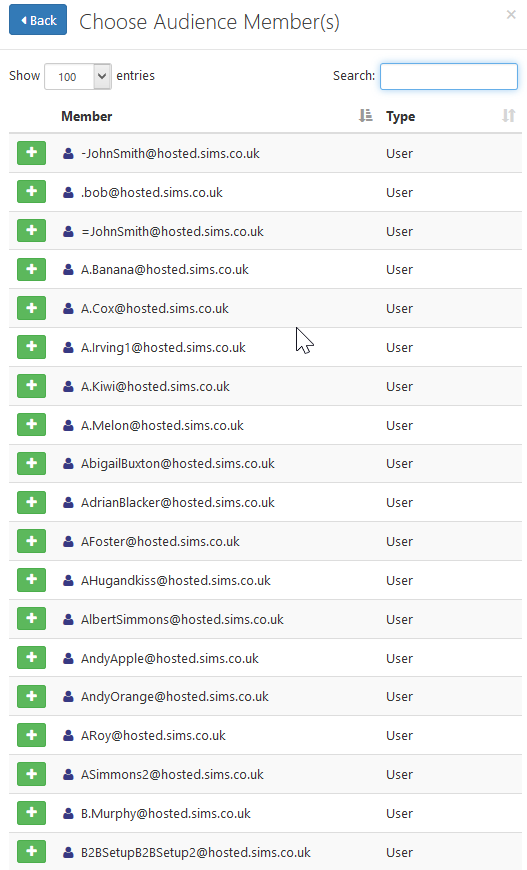
The search box at the top of the list makes finding individuals easy.
Once done Click ‘Save’ and a confirmation dialogue will be displayed showing the changes you are about to commit.
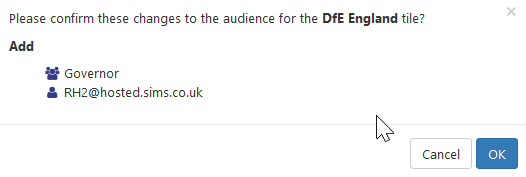
Click ‘OK’ to commit those changes.
De-Audiencing a tile
Once a tile is audienced (added to one or more users Launcher Page) you can see two buttons on the tile, inside the tile store.
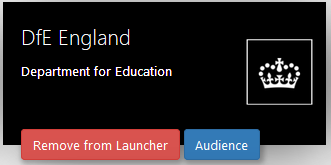
“Remove from Launcher” removes the tile from everyone, it De-Audience the tile
Modifying a tiles audience.
The * ‘Audience’* button allows you to see who has access to the tile and modify it.
Clicking ‘Audience’ shows who can currently see the tile

Clicking ‘Everyone’ will change the audience to everyone at the site. Clicking ‘Custom Audience’ will allow you to remove groups and individuals.
Click the red ‘X’ to remove the group or user and click ‘Save’ to finish. You can add more groups or individuals using the ‘Add members’ button as previously described.
Available Applications Screen Actions.
On the Available Applications Screen, you will be presented with a number of tiles. These tiles are applications that are available to deploy at your site.
Available Application may be associated with 'paid for' products from Capita or third-parties that integrate with Capita. Installing these tiles will not incur a charge but the tile may not function until you have purchased the product from the relevant supplier.
Some Applications will exchange data with third parties. Installing the tile will detail what data is exchanged and allow you to authorise this data exchange or decline it.
Some Applications will require you to enter some configuration information this will be detailed when you install the application.
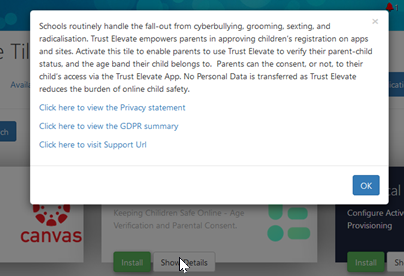
Finding out about an Application
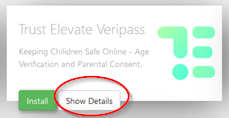
On each Application, there is a Show Details button. Clicking this button will provide you with information about the application. Also included are links to the applications: * Privacy Statement * GDPR data transfer summary * Support Page
Installing an Application
To install an application click on the green Install Button on the tile.
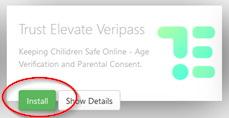
An install button will not show if that tile is not available for install at your site - This may because the third-party vendor has decided to limit installation of the site
An install button will not show if the application is already installed at your site. Installed applications show in Available Tiles..
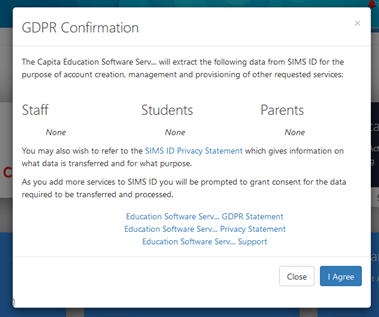
Accepting a Data transfer
When you install a tile you may be asked to Approve a GDPR data transfer screen. Please ensure you are authorised to accept this and make reference to the information presented on the screen and the information contained in the documentation linked to from the application
Configuration Data
On installing an application you may be provided with information that you will need to configure in the third party product or pass to the provider of the application.
Alternatively, you may be prompted to enter configuration data that you have been provided by the third-party product vendor.
Managing Installed Application
Once installed the application becomes available on the *Available Tiles screen
Vendor Configuration
Before a tile can be audienced it may appear in a pending state. This means that the Vendor of this tile needs to configure something in their system. Once they have done this they will activate the tile.
Audiancing an Applcation.
Once installed the application becomes available on the Available Tiles screen and can by audienced just like other tiles. See audiancing a tile.
Uninstalling an Application
To uninstall an Application please find the Application in Available Tiles and click the red Remove button.
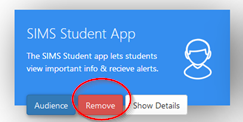
This will uninstall the tile and clear any configuration information. The Application will be made available to reinstall inside Available Applications.