Administering SIMS ID
1. Managing1. The role of Site Administrator- 2. Creating SIMS ID Users
1.5 Finding3. Workingawithoutusers’Automatedinitial username and passwordprovisioning2. ManagingUsersthroughwithouttheHostedUserSIMS3. Administering3.2 Administering users with CSV uploads
Administering SIMS ID Users
ManagingThe Usersrole withof HostedSite SIMSAdministrator
SIMS ID Site Admins are the only users that can manage userUser account
Account permissions across your schoolschool. so whenWhen you first join the service we
will ask you to provide details on who you want your Site Admins to be.
The school’s first site administrator can setup other users to also be
Site Admins.
It is common for users to be SIMS ID Site Adminsadmins as well as
being users of SIMS and or FMSFMS.
What users.can a Site Administrator do?
A SIMS ID Site Administrator can:
Pick up new staff unclaimed usernames and passwords.
Grant users access to Applications such as SIMS and FMS. (By default users do not have access to any Hosted applications)
Reset other user’s passwords, if they are unable to carry out the self-service password reset process.
Change the
schoolsschool's background theme based on a set of pre-defined background images.Approve a user from another SIMS ID school or SIMS Support unit to be part of the school site so that access to SIMS or FMS can be granted to users outside of the school.
Creating new users in SIMS and SIMS ID Users
Automated User Provisioning from SIMS
Hosted SIMS
Hosted SIMS \ SIMS ID users are created automatically in SIMS ID once a
user has been setup in System Manager and SIMS.
Please see
Managing Hosted SIMS or FMS users For information on adding users in Hosted SIMS and Hosted FMS
Local SIMS
Customers with Local SIMS Staff / Pupils etc are created automatically in SIMS ID if the People Service has been licenced.
If you would like to use Automated Provisioning from SIMS
Working without Automated provisioning
We would always recommend using Automated Provisioning for convenience and to unlock the full potential of your SIMS ID, there may be occasions this is not appropriate or you need to add a user that does not exist in SIMS.
Adding a newuser staffmanually memberthrough followsthe thisUser process.Interface
In addition to SIMS populating and managing the users in SIMS ID, Site
Admins also have the ability to manually create users in SIMS ID. If you
are a hosted SIMS school it is recommended you wait for the user to come
through from SIMS into SIMS ID rather than creating users manually.

The following scenarios are typical reasons to use the “Add New User”
feature
CreateYou theare newa staffsite memberthat inuses SIMSHosted Personnel.FMS Thisonly Quick
reference
sheetand your users will guideneed youto
be throughsetup the steps.manually.
SetupYou thewant to setup an additional Site administrator that does need to
exist as a user in SIMS Systemor Managerhave andaccess grantto them the required
SIMS Permissions.SIMS.
WaitYou upuse SIMS ID Light to 70manage Minutesyour office 365 / Google accounts
and you want to create a new user.
You are a SIMS Support unit and you want to create Support users.
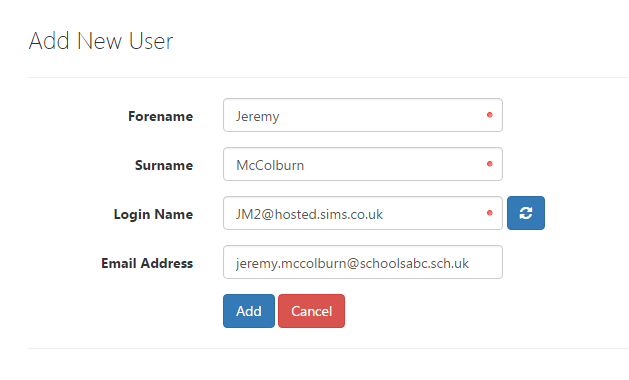
To complete the manual creation of a new user enter the details in the Add New User screen, clicking on the blue arrows button will generate an available username for your new useruser.
The toemail appearaddress infield youris SIMSnot ID
user list
Change the users security groups to include SIMS and any other
hosted SIMS application (please see page 28 of this guide)
Pick up the users new SIMS ID username and password from the
“unclaimed password” list in SIMS ID
Oncemandatory.
After the user has been created inthe user’s new password can be obtained from the Unclaimed Passwords list.
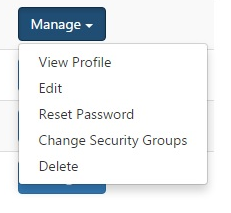
Users that are created manually have two additional options under the “Manage” drop down, Edit and Delete. You will only see the Edit and Delete options for the user that are created manually and added through the “Add New User” process.
Administering users with CSV uploads
You can administer SIMS SystemID users by CSV upload. This should not be done if you can administer users automatically from within SIMS using the SIMS People Service.
Login into SIMS ID
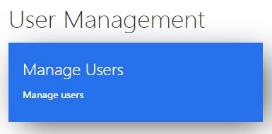
Click on the Users Tile
Click on the Manager theyUsers Tile
If your login works across all the schools that you manage; select the school you are dealing with otherwise skip this step. the CSV
Import button
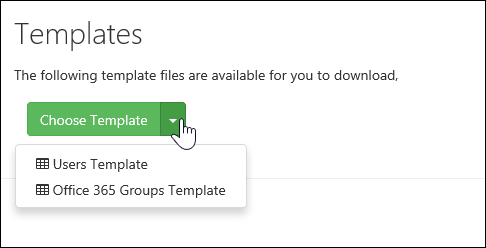
You can > download the correct CSV template for the action you wish to undertake
This template will shortly
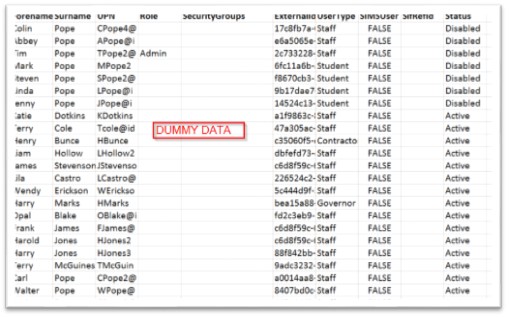
appearbe pre-populated with the currently provisioned users.
As this is personal data this should be handled securely.
Make the required changes to users.
New users can be added as new rows.
To delete a user set the status to ‘Disabled’ OR delete the row.
Upload the CSV using the upload function.
CAUTION – uploading a blank CSV will disable all CSV provisioned users.
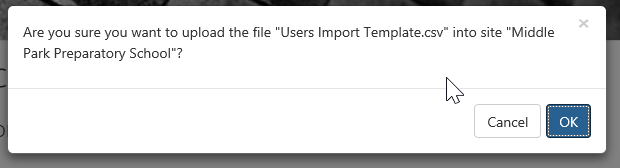
Accept the confirmation dialogue
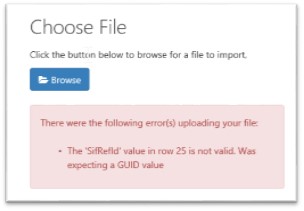
Any errors will be displayed.
Once corrected you can re-upload.
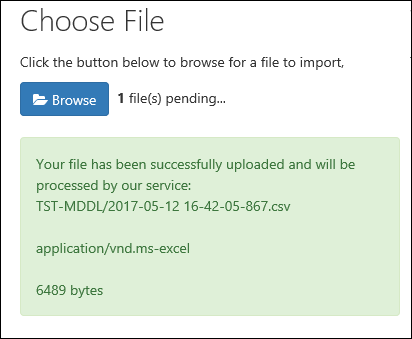
A Success message is provided following a successful upload.
Once uploaded the changes will be processed by the system. How long the changes will take to process will depend on the action being undertaken and the services applied to the user. Some actions such as O365 provisioning are reliant on Microsoft or other third parties.
You can only edit CSV provisioned users using the CSV method. Manually provisioned users must be administered using the user interface. Users provisioned automatically by SIMS must be administered in theSIMS.
How “Users”to listtell ofby SIMSwhat ID. Oncemethod a user has been createdprovisioned
If from
SIMSyou want to know how a user has been provisioned, you can find the user in User Management and then select Manage next to the user concerned
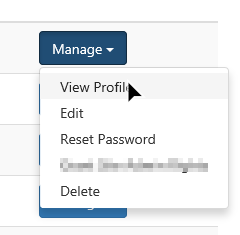
Then Click View Profile (you can also tell this is manageda UI created user as you have the option to edit it in SIMSthe IDcontext theysensitive cannotmenu)
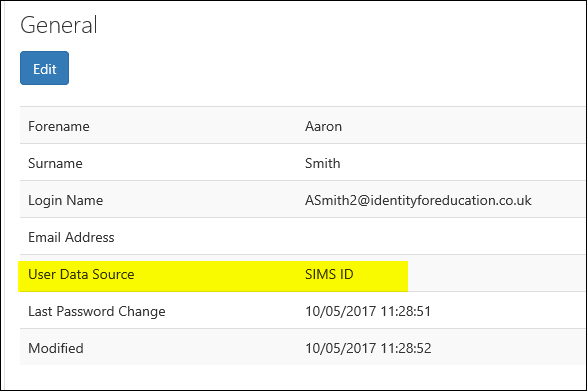
The behighlighted deletedsection manuallyin fromthe SIMSprofile below shows this user was created in the UI, it would say CSV Import if brought in by that
ID,method staffetc.
Further shoulddetails haveon theirthe contractcontents setof tothe expireMy Profile is available.
Finding a users’ initial username and be removed from
SIMS system manager as well as having their SIMS ID permissions removed.
Granting SIMS ID users access to SIMSpassword
After logging into https://id.sims.co.uk
as a SIMS ID Site Administrator click on the
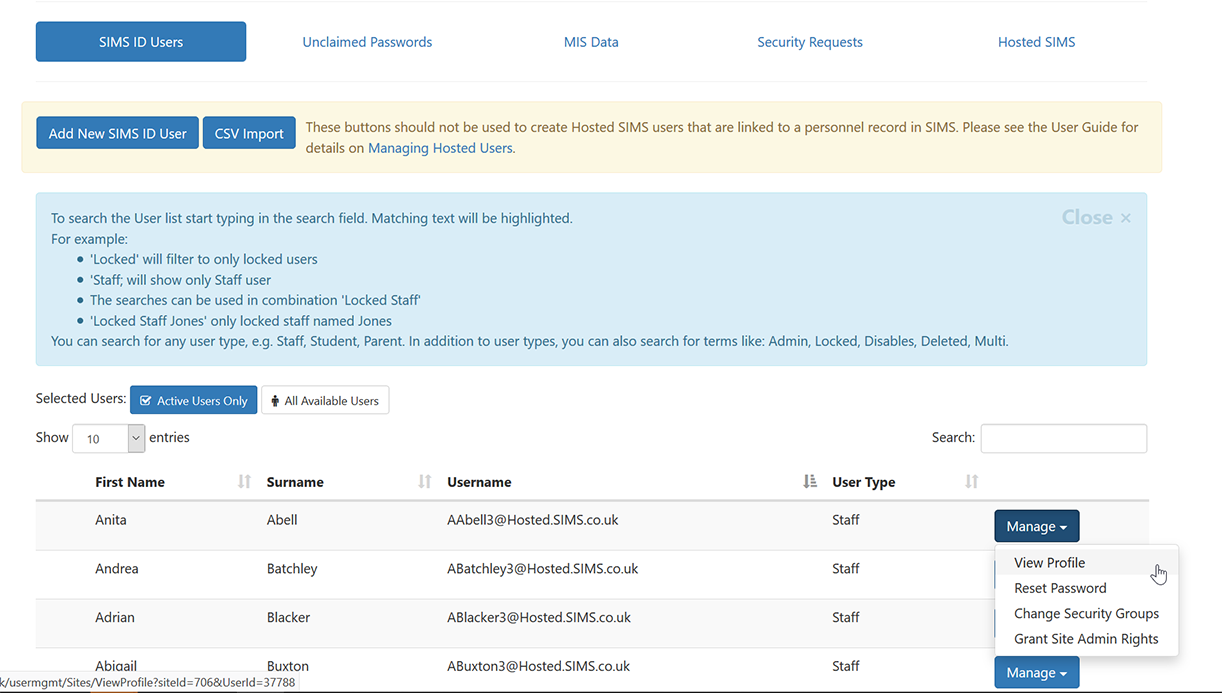
Orange “Users”users’ iconicon. andThis thenwill take you to the Blueuser “Managemanagement Users” iconscreen.
If you are a
SIMS Support Unit or a Multi Academy trust you will be asked to select
the school for the users you wish to manage. AClick liston ofthe “Unclaimed passwords” link
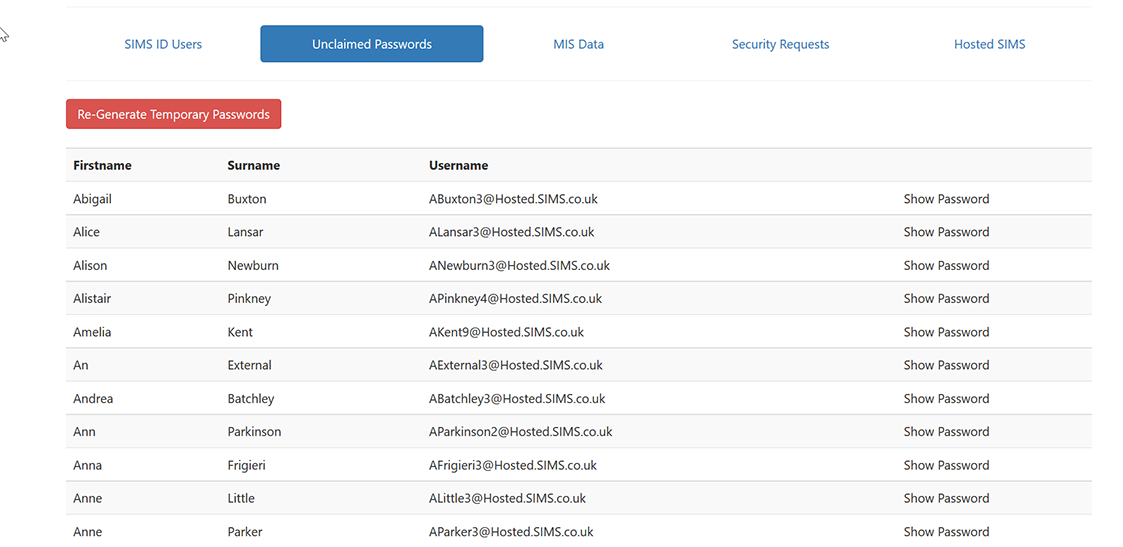 This page allows you to view all
 ofusers at your
users forsite thethat schoolhave arenot displayed,yet logged into SIMS ID so you can filterprovide thesethe byuser clicking
onwith their initial username and password. Once a filteruser typechanges suchtheir aspassword Adminthey users.no Thelonger usersappear on this list.
Initially, the list will not show the password, this is baseddone for security reasons. Click on the
'live'‘Show staffPassword’ in SIMS and is updated uplink to an hour after new users are
created\recorded in SIMS.
The list of users can be filtered usingshow the filterpassword Click buttonson above‘Hide the
list of users. Filtering by “Locked out Users” shows users who have
failedPassword’ to answerhide theira securitypassword.
If questionsyou threeare times. Inactive users
will be users that have been disabled in system manager or have an
expired contract date in SIMS personnel. You can also searchsearching for a particular user
by typingyou allcan oruse partthe ofsearch theirfeature name.in your browser. Pressing CTRL-F on your keyboard will normally launch this.
To manage a user click the “Manage” button to the right of the user’s
username. Users with the menu icon on the right of the screen are Site
Admin users and cannot have their permissions changed by other Site
Admin users. Changes to Site Admin users can be requested by logging a
support call.
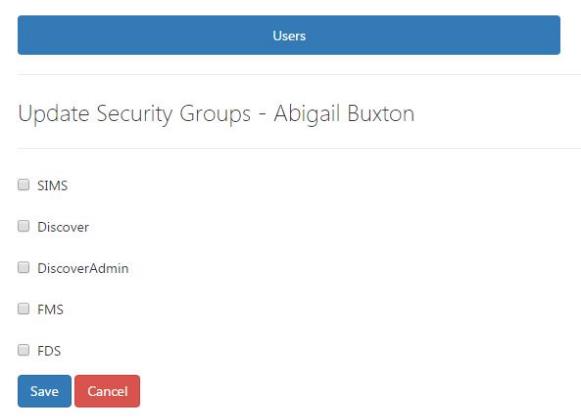
To grant a user with access to a hosted application choose “Change
Security Groups” from the Manage button.
Tick the applicationsIf you wish to grantyou thecan user access tocopy and click
“Save”. This will place a Tile on the users launch screen or remove a
Tile from the users launch screen if un-ticked.
Please note: If you require access to a specific Northampton
application please log a support call to have these enabled.
Hosted SIMS Licences
If you receive a message “You have run out of Hosted SIMS Licences”,
please removepaste all of the ticksusers from usersthe whoscreen nointo longeran requireExcel access
and click save, this will free up licences backspreadsheet to further filter your school.
Alternativelyusers pleaseand logtheir initial passwords.
You can choose to distribute your user’s initial usernames and > passwords in a supportsecure call to discuss purchasing
additional licences. You will also receive a warning message when you
are running low on licences.

>

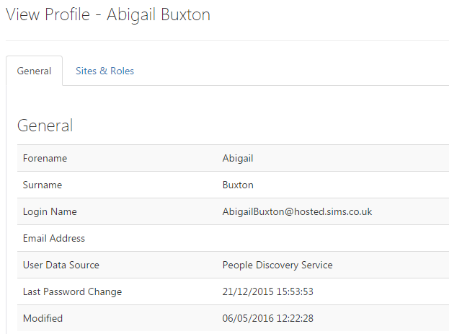
Selecting “View Profile” will show details about the user including.
Name
Login name
Email address
User Data source - Where the user originated from
Last password change date
Modified date
The Site & Roles screen shows which schools\sites the user is a member of and what their role is at that site.
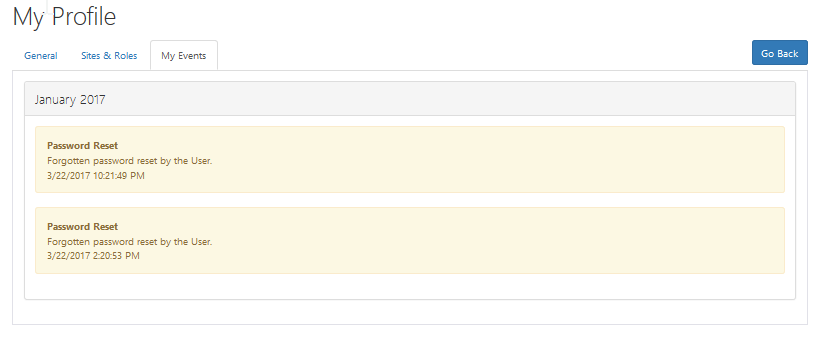
The My Profile (user profile) has a new tab called My events. This tab details user events such as when user passwords were changed and by who. Further details will be added to this tab to allow you to keep controlmethod of your identity. choice.
|
RemovingResetting accessa touser’s SIMS ID, SIMS and FMSpassword
ToAfter removelogging access to all applications it is recommended changes are made
both within the application and within SIMS ID.
Login tointo https://id.sims.co.uk
as a SIMS ID Site AdminAdministrator click on the
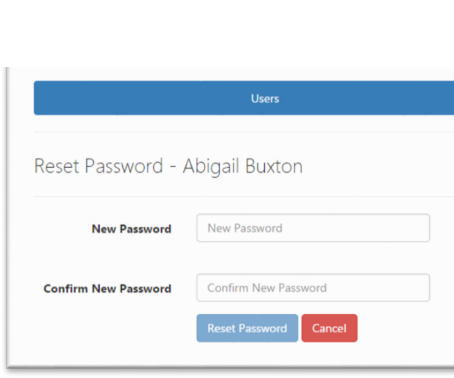
Orange “Users” iconicon. Press CTRL-F to launch the browser find feature and thenenter the Blueuser’s “Manageusername. Users”Click icon
‘Manage’ and choose “Reset password”
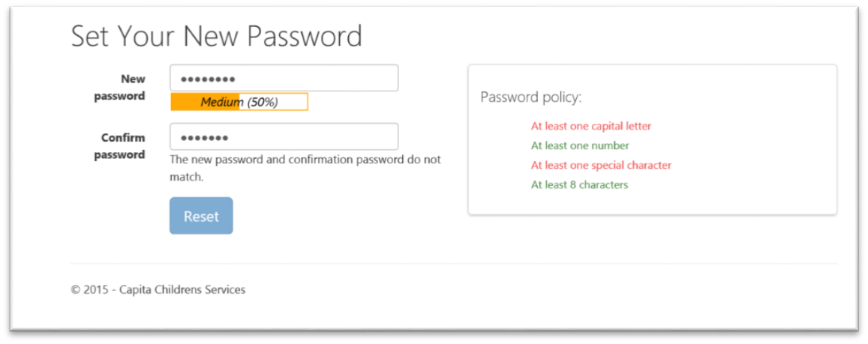
FindThe new password entered will tell you the userstrength of the password you wishare choosing.
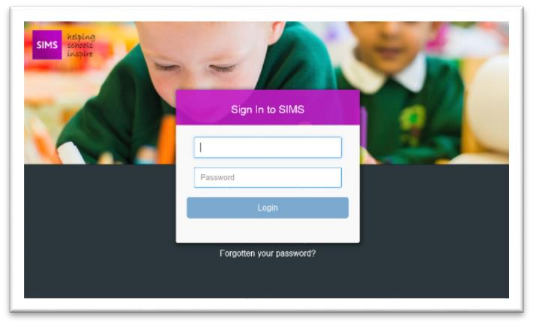
What to removedo accessif for,a user forgets their password
If you forget your password, you can alsoclick search for
a user by typing all or part of their name.
Clickon the “Manage”‘Forgotten buttonpassword’ link from https://id.sims.co.uk.
If you forget your username, please contact your SIMS ID Site Administrator.
When resetting your password you will be asked to theprovide right of the user’syour username and
reset asked to answer three of your five security questions. Please note the usersanswers to your security questions are not displayed for security reasons.
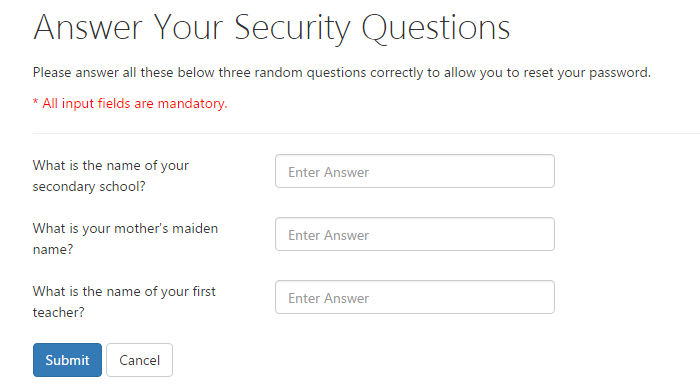
If successfully answered you will be prompted to set a new password
If soyou thatdo theynot cansuccessfully noanswer longerthe accesssecurity questions, after three attempts you will be prevented from using the Forgotten Password service and you will be directed to log a support call or contact your SIMS ID ite administrator to have your password reset.
-
Working with Multiple Schools
ClickSome the “Manage” button and select “change security groups” Untick
all of the application security groups and click save.
Remove the user’s permissionscustomers from SIMSMulti andAcademy changeTrusts theor user’s
personalLocal recordAuthorities have access to reflectmultiple theirSites.
SIMS currentID status.
Ifsupports requiredMulit-Site removeaccess. You thedo usersnot permissionsneed fromto FMS.
have a different login at each site. See Hosted-Multisite Access for details.
| | |
|-----|-----|
Finding a users’ initial username and password
After logging into https://id.sims.co.uk
as a SIMS ID Site Administrator click on the
users’ icon. This will take you to the user management screen.
If you are a SIMS Support Unit or a Multi Academy trust you will be
asked to select the school for the users you wish to manage. Click on
the “Unclaimed passwords” link
This page allows you to view all users at your site that have not yet
logged into SIMS ID so you can provide the user with their initial
username and password. Once a user changes their password they no
longer appear on this list.
Initially the list will not show the password, this is done for
security reasons. Click on ‘Show Password’ link to show the password.
Click on ‘Hide Password’ to hide a password.
If you are searching for a particular user you can use the search
feature in your browser. Pressing CTRL-F on your keyboard will
normally launch this.
If you wish to you can copy and paste all of the users from the screen
into an excel spreadsheet to further filter your users and their
initial passwords.
You can choose to distribute your user’s initial usernames and
passwords in a secure method of your choice.
Resetting a user’s password
After logging into https://id.sims.co.uk
as a SIMS ID Site Administrator click on the
“Users” icon. Press CTRL-F to launch the browser find feature and
enter the user’s username. Click ‘Manage’ and choose “Reset password”
The new password entered will tell you the strength of the password
you are choosing.
Accessing multiple sites
SIMS ID allows users to access more than one school with a single
username and password. The process starts with the user’s school that
contains the user wanting to access another school, this school is
called the originating site.
The originating sites data controller will need to log a support
call asking for a named user to be sent to a Destination site for
security approval.
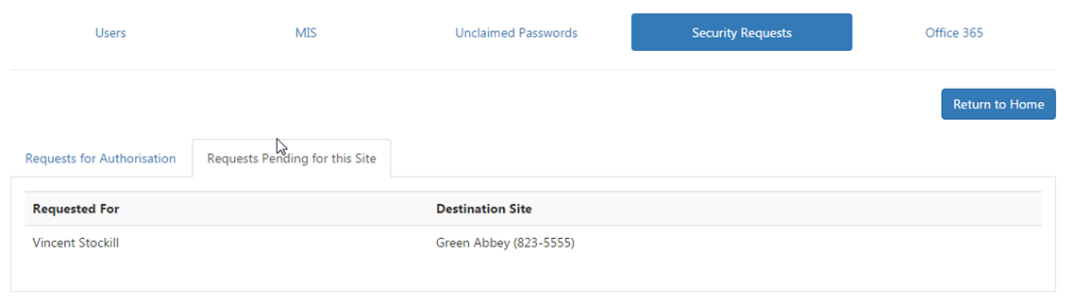
Once support call has been completed the target site will need to
approve or decline the security request from within the “Security
Request” page. If the user is approved the user will appear under the
“users” list and permissions to applications can be setup like any other
user from the site.

The Destination site will be able to see that the request is pending
from the “Requests Pending for this Site” screen
The following scenario explains the process of setting up multi-site
users:
Scenario: A teacher Jeremy Colburn requires access to two Hosted
SIMS schools. He wants to use his account jcolburn1@hosted.sims.co.uk
to login to both schools.
Process:
Jeremy Colburn is setup in school 1 in SIMS Personnel and SIMS
System Manager. School1 automatically syncs with SIMS ID and
creates a SIMS ID username of jcolburn1@hosted.sims.co.uk which
has access to School 1.
A case is logged with the Capita service desk asking for jcolburn1
of school1 to be granted access to school2.
The desk will send a pending request for jcolburn1 to school2. A
site administrator of school2 logs into SIMS ID and under user
management “Security Requests” Approves the security request.
A site administrator of school2 logs into SIMS ID and finds
jcolburn1@hosted.sims.co.uk in the list of users and grants
jcolburn1 access to the SIMS application of school2.
A SIMS manager at school 2 logs into SIMS System Manager of school2
and creates a user Jeremy Colburn with the correct SIMS System
Manager group permissions and sets the user to Active.
The “username” for Jeremy Colburn at school is us updated with
“SIMS\jcolburn1” where jcolburn1 is the first part of the person’s
username, the user is saved. . See example below.

jcolburn1@hosted.sims.co.uk will now be able to login to
https://id.sims.co.uk and access both schools.
*Please note an additional user Jeremy Colburn will appear in the
list of users at school 2, this user can be ignored. This process
can be repeated at multiple school in a scenario where a SIMS
Support person requires and permitted access to multiple schools. *
Managing Access to multiple schools
Some customers from Multi Academy Trusts or Local Authorities have
access to multiple databases.
If you have access to multiple databases then you are able to swap
between the databases using the SIMS Multi Site Selector or the FMS
Multi Site Selector. You simply need to select the school from the grey
drop down and launch the application for the chosen school. You can only
be connected to one school at a time.
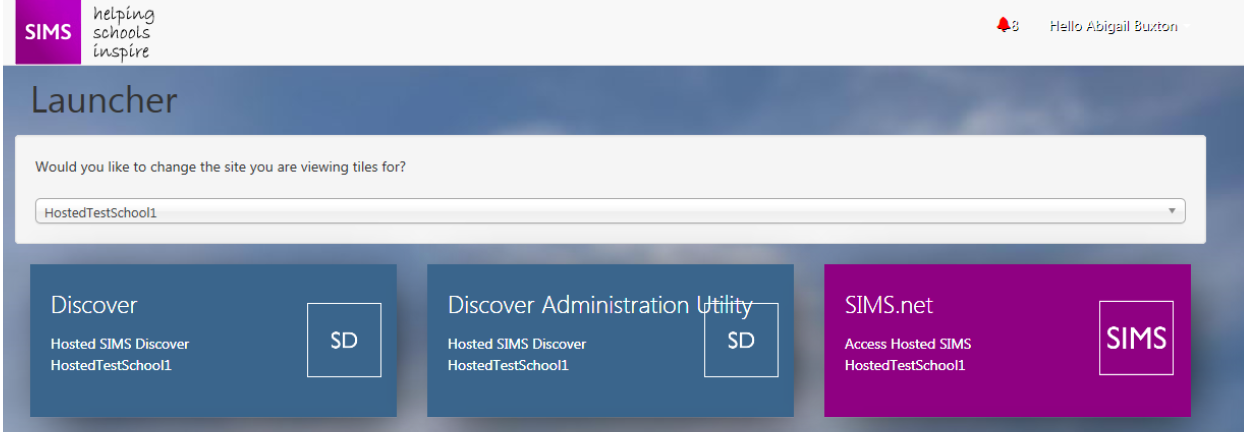
From the drop down simply select your school and you will notice the
tile text changes for each tile based on the selected school. Simply
click the tile to Launch, SIMS or Discover for the required schools.
Please note you can only be logged into one school at a time, trying
to open another schools SIMS or Discover system will prompt you to
logout of your current school.
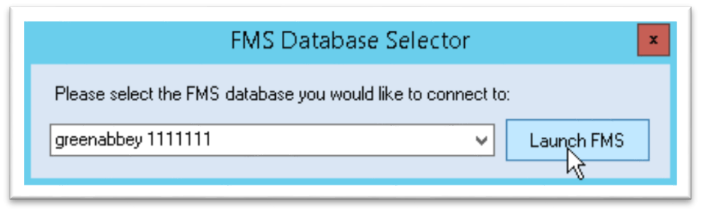
FMS Multi Selector
Click on the FMS tile in SIMS ID.
When the application launches you will be presented with a drop down
list of the databases you have access to.
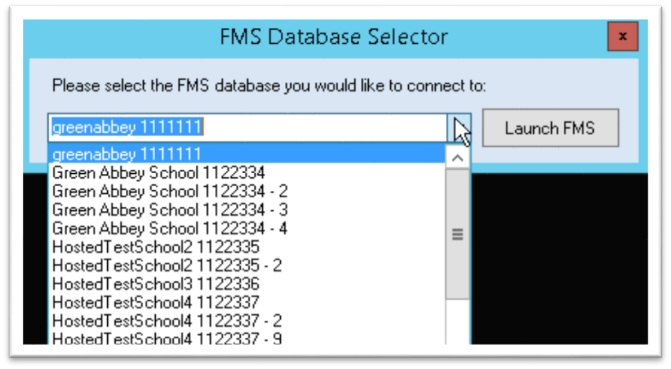
Click on the drop down list and select the school you wish to access and
click on OK to launch FMS.
Adding a user manually
In addition to SIMS populating and managing the users in SIMS ID, Site
Admins also have the ability to manually create users in SIMS ID. If you
are a hosted SIMS school it is recommended you wait for the user to come
through from SIMS into SIMS ID rather than creating users manually.
The following scenarios are typical reasons to use the “Add New User”
feature
You are a site that uses Hosted FMS only and your users will need to
be setup manually.
You want to setup an additional Site administrator that does need to
exist as a user in SIMS or have access to SIMS.
You use SIMS ID Light to manage your office 365 / Google accounts
and you want to create a new user.
You are a SIMS Support unit and you want to create Support users.
|
| To complete the manual creation of a new user enter the details in the Add New User screen, clicking on the blue arrows button will generate an available username for your new user.
The email address field is not mandatory. After the user has been created the user’s new password can be obtained from the Unclaimed Passwords list. |
|-------------------------------------------------------------------------------------------------------------------------------------------------------------------------------------------------------------------------------------------|---------------------------------------------------------------------------------------------------------------------------------------------------------------------------------------|
| Users that are created manually have two additional options under the “Manage” drop down, Edit and Delete. You will only see the Edit and Delete options for user that are created manually and added through the “Add New User” process. |
|
Managing Users without Hosted SIMS
Finding a users’ initial username and password
After logging into https://id.sims.co.uk
as a SIMS ID Site Administrator click on the
users’ icon. This will take you to the user management screen.
If you are a SIMS Support Unit or a Multi Academy trust you will be
asked to select the school for the users you wish to manage. Click on
the “Unclaimed passwords” link
This page allows you to view all users at your site that have not yet
logged into SIMS ID so you can provide the user with their initial
username and password. Once a user changes their password they no
longer appear on this list.
Initially the list will not show the password, this is done for
security reasons. Click on ‘Show Password’ link to show the password.
Click on ‘Hide Password’ to hide a password.
If you are searching for a particular user you can use the search
feature in your browser. Pressing CTRL-F on your keyboard will
normally launch this.
If you wish to you can copy and paste all of the users from the screen
into an excel spreadsheet to further filter your users and their
initial passwords.
You can choose to distribute your user’s initial usernames and
passwords in a secure method of your choice.
Resetting a user’s password
After logging into https://id.sims.co.uk
as a SIMS ID Site Administrator click on the
“Users” icon. Press CTRL-F to launch the browser find feature and
enter the user’s username. Click ‘Manage’ and choose “Reset password”
The new password entered will tell you the strength of the password
you are choosing.
What to do if a user forgets their password
If you forget your password, you can click on the ‘Forgotten password’
link from https://id.sims.co.uk
.
If you forget your username, please contact your SIMS ID Site
Administrator.
When resetting your password you will be asked to provide your username
and asked to answer three of your five security questions. Please note
the answers for your security questions are not displayed for security
reasons.
If successfully answered you will be prompted to set a new password
If you do not successfully answer the security questions, after three
attempts you will be prevented from using the Forgotten Password service
and you will be directed to log a support call or contact your SIMS ID
site administrator to have your password reset.
Managing Access to multiple schools
Some customers from Multi Academy Trusts or Local Authorities have
access to multiple databases.
If you have access to multiple databases then you are able to swap
between the databases using the SIMS Multi Site Selector or the FMS
Multi Site Selector. You simply need to select the school from the grey
drop down and launch the application for the chosen school. You can only
be connected to one school at a time.
From the drop down simply select your school and you will notice the
tile text changes for each tile based on the selected school. Simply
click the tile to Launch, SIMS or Discover for the required schools.
Please note you can only be logged into one school at a time, trying
to open another schools SIMS or Discover system will prompt you to
logout of your current school.
Adding a user manually
In addition to SIMS populating and managing the users in SIMS ID, Site
Admins also have the ability to manually create users in SIMS ID. If you
are a hosted SIMS school it is recommended you wait for the user to come
through from SIMS into SIMS ID rather than creating users manually.
The following scenarios are typical reasons to use the “Add New User”
feature
You are a site that uses Hosted FMS only and your users will need to
be setup manually.
You want to setup an additional Site administrator that does need to
exist as a user in SIMS or have access to SIMS.
You use SIMS ID Light to manage your office 365 / Google accounts
and you want to create a new user.
You are a SIMS Support unit and you want to create Support users.
|
| To complete the manual creation of a new user enter the details in the Add New User screen, clicking on the blue arrows button will generate an available username for your new user.
The email address field is not mandatory. After the user has been created the user’s new password can be obtained from the Unclaimed Passwords list. |
|-------------------------------------------------------------------------------------------------------------------------------------------------------------------------------------------------------------------------------------------|---------------------------------------------------------------------------------------------------------------------------------------------------------------------------------------|
| Users that are created manually have two additional options under the “Manage” drop down, Edit and Delete. You will only see the Edit and Delete options for user that are created manually and Added through the “Add New User” process. |
|
Administering users with CSV uploads
You can administer SIMS ID users by CSV upload. This should not be
done if you can administer users automatically from within SIMS using
the SIMS People Service.
Login into SIMS ID
Click on the Users Tile
Click on the Manager Users Tile
If your login works across all the schools you manage select the
school you are dealing with otherwise skip this step.
Click the CSV
Import button
You can
download the correct csv template for the action you wish to undertake
This template will be pre-populated with the currently provisioned
users.
As this is personal data this should be handled securely.
Make the required changes to users.
New users can be added as new rows.
To delete a user set the status to ‘Disabled’ OR delete the row.
Upload the CSV using the upload function.
CAUTION – uploading a blank CSV will disable all CSV provisioned
users. Just as it would in OPENHIVE.
Accept the confirmation dialogue
Any errors will be displayed.
Once corrected you can re-upload.
A Success message is provided following a successful upload.
<
Once uploaded the changes will be processed by the system. How long
the changes will take to process will depend on the action being
undertaken and the services applied to the user. Some actions such as
O365 provisioning are reliant on Microsoft or other third parties.
You can only edit CSV provisioned users using the CSV method. Manually
provisioned users must be administered using the user interface. Users
provisioned automatically by SIMS must be administered in SIMS.
How to tell by what method a user has been provisioned
If you want to know how a user has been provisioned, you can find the
user in User Management and then select Manage next to the user
concerned
Then Click View Profile (you can also tell this is a UI created user
as you have the option to edit it in the context sensitive menu)
The highlighted section in the profile below shows this user was
created in the UI, it would say CSV Import if brought in by that
method etc.
CreateYou theare newa staffsite memberthat inuses SIMSHosted Personnel.FMS Thisonly Quick
reference
sheetand your users will guideneed youto
be throughsetup the steps.manually.
SetupYou thewant to setup an additional Site administrator that does need to
exist as a user in SIMS Systemor Managerhave andaccess grantto them the required
SIMS Permissions.SIMS.
WaitYou upuse SIMS ID Light to 70manage Minutesyour office 365 / Google accounts
and you want to create a new user.
You are a SIMS Support unit and you want to create Support users.
To complete the manual creation of a new user enter the details in the Add New User screen, clicking on the blue arrows button will generate an available username for your new
Change the users security groups to include SIMS and any other
hosted SIMS application (please see page 28 of this guide)
Pick up the users new SIMS ID username and password from the
“unclaimed password” list in SIMS ID
Oncemandatory.
After logging into https://id.sims.co.uk
as a SIMS ID Site Administrator click on the
Orange “Users”users’ iconicon. andThis thenwill take you to the Blueuser “Managemanagement Users” iconscreen.
If you are a
SIMS Support Unit or a Multi Academy trust you will be asked to select
the school for the users you wish to manage. AClick liston ofthe “Unclaimed passwords” link
This page allows you to view all ofusers at your
users forsite thethat schoolhave arenot displayed,yet logged into SIMS ID so you can filterprovide thesethe byuser clicking
onwith their initial username and password. Once a filteruser typechanges suchtheir aspassword Adminthey users.no Thelonger usersappear on this list.
Initially, the list will not show the password, this is baseddone for security reasons. Click on the
'live'‘Show staffPassword’ in SIMS and is updated uplink to an hour after new users are
created\recorded in SIMS.
To manage a user click the “Manage” button to the right of the user’s
username. Users with the menu icon on the right of the screen are Site
Admin users and cannot have their permissions changed by other Site
Admin users. Changes to Site Admin users can be requested by logging a
support call.
To grant a user with access to a hosted application choose “Change
Security Groups” from the Manage button.
Tick the applicationsIf you wish to grantyou thecan user access tocopy and click
“Save”. This will place a Tile on the users launch screen or remove a
Tile from the users launch screen if un-ticked.
Please note: If you require access to a specific Northampton
application please log a support call to have these enabled.
If you receive a message “You have run out of Hosted SIMS Licences”,
please removepaste all of the ticksusers from usersthe whoscreen nointo longeran requireExcel access
and click save, this will free up licences backspreadsheet to further filter your school.
Alternativelyusers pleaseand logtheir initial passwords.
You can choose to distribute your user’s initial usernames and > passwords in a supportsecure call to discuss purchasing
additional licences. You will also receive a warning message when you
are running low on licences.
FindThe new password entered will tell you the userstrength of the password you wishare choosing.
What to removedo accessif for,a user forgets their password
If you forget your password, you can alsoclick search for
a user by typing all or part of their name.
Clickon the “Manage”‘Forgotten buttonpassword’ link from https://id.sims.co.uk.
If you forget your username, please contact your SIMS ID Site Administrator.
When resetting your password you will be asked to theprovide right of the user’syour username and
reset asked to answer three of your five security questions. Please note the usersanswers to your security questions are not displayed for security reasons.
If successfully answered you will be prompted to set a new password
If soyou thatdo theynot cansuccessfully noanswer longerthe accesssecurity questions, after three attempts you will be prevented from using the Forgotten Password service and you will be directed to log a support call or contact your SIMS ID ite administrator to have your password reset.
Working with Multiple Schools
ClickSome the “Manage” button and select “change security groups” Untick
all of the application security groups and click save.
Remove the user’s permissionscustomers from SIMSMulti andAcademy changeTrusts theor user’s
personalLocal recordAuthorities have access to reflectmultiple theirSites.
SIMS currentID status.
Ifsupports requiredMulit-Site removeaccess. You thedo usersnot permissionsneed fromto FMS.
have a different login at each site. See Hosted-Multisite Access for details.Finding a users’ initial username and password
After logging into https://id.sims.co.uk as a SIMS ID Site Administrator click on the users’ icon. This will take you to the user management screen.
If you are a SIMS Support Unit or a Multi Academy trust you will be asked to select the school for the users you wish to manage. Click on the “Unclaimed passwords” link
This page allows you to view all users at your site that have not yet logged into SIMS ID so you can provide the user with their initial username and password. Once a user changes their password they no longer appear on this list.
Initially the list will not show the password, this is done for security reasons. Click on ‘Show Password’ link to show the password. Click on ‘Hide Password’ to hide a password.
If you are searching for a particular user you can use the search feature in your browser. Pressing CTRL-F on your keyboard will normally launch this.
If you wish to you can copy and paste all of the users from the screen into an excel spreadsheet to further filter your users and their initial passwords.
You can choose to distribute your user’s initial usernames and passwords in a secure method of your choice.
After logging into https://id.sims.co.uk
as a SIMS ID Site Administrator click on the
“Users” icon. Press CTRL-F to launch the browser find feature and
enter the user’s username. Click ‘Manage’ and choose “Reset password”
The new password entered will tell you the strength of the password
you are choosing.
Jeremy Colburn is setup in school 1 in SIMS Personnel and SIMS
System Manager. School1 automatically syncs with SIMS ID and
creates a SIMS ID username of jcolburn1@hosted.sims.co.uk which
has access to School 1.
A case is logged with the Capita service desk asking for jcolburn1
of school1 to be granted access to school2.
The desk will send a pending request for jcolburn1 to school2. A
site administrator of school2 logs into SIMS ID and under user
management “Security Requests” Approves the security request.
A site administrator of school2 logs into SIMS ID and finds
jcolburn1@hosted.sims.co.uk in the list of users and grants
jcolburn1 access to the SIMS application of school2.
A SIMS manager at school 2 logs into SIMS System Manager of school2
and creates a user Jeremy Colburn with the correct SIMS System
Manager group permissions and sets the user to Active.
The “username” for Jeremy Colburn at school is us updated with
“SIMS\jcolburn1” where jcolburn1 is the first part of the person’s
username, the user is saved. . See example below.
jcolburn1@hosted.sims.co.uk will now be able to login to
https://id.sims.co.uk and access both schools.
*Please note an additional user Jeremy Colburn will appear in the
list of users at school 2, this user can be ignored. This process
can be repeated at multiple school in a scenario where a SIMS
Support person requires and permitted access to multiple schools. *
From the drop down simply select your school and you will notice the
tile text changes for each tile based on the selected school. Simply
click the tile to Launch, SIMS or Discover for the required schools.
Please note you can only be logged into one school at a time, trying
to open another schools SIMS or Discover system will prompt you to
logout of your current school.
You are a site that uses Hosted FMS only and your users will need to
be setup manually.
You want to setup an additional Site administrator that does need to
exist as a user in SIMS or have access to SIMS.
You use SIMS ID Light to manage your office 365 / Google accounts
and you want to create a new user.
You are a SIMS Support unit and you want to create Support users.
The email address field is not mandatory. After the user has been created the user’s new password can be obtained from the Unclaimed Passwords list. |
After logging into https://id.sims.co.uk
as a SIMS ID Site Administrator click on the
users’ icon. This will take you to the user management screen.
If you are a SIMS Support Unit or a Multi Academy trust you will be
asked to select the school for the users you wish to manage. Click on
the “Unclaimed passwords” link
This page allows you to view all users at your site that have not yet
logged into SIMS ID so you can provide the user with their initial
username and password. Once a user changes their password they no
longer appear on this list.
Initially the list will not show the password, this is done for
security reasons. Click on ‘Show Password’ link to show the password.
Click on ‘Hide Password’ to hide a password.
If you are searching for a particular user you can use the search
feature in your browser. Pressing CTRL-F on your keyboard will
normally launch this.
If you wish to you can copy and paste all of the users from the screen
into an excel spreadsheet to further filter your users and their
initial passwords.
You can choose to distribute your user’s initial usernames and
passwords in a secure method of your choice.
After logging into https://id.sims.co.uk as a SIMS ID Site Administrator click on the “Users” icon. Press CTRL-F to launch the browser find feature and enter the user’s username. Click ‘Manage’ and choose “Reset password”
The new password entered will tell you the strength of the password you are choosing.
From the drop down simply select your school and you will notice the
tile text changes for each tile based on the selected school. Simply
click the tile to Launch, SIMS or Discover for the required schools.
Please note you can only be logged into one school at a time, trying
to open another schools SIMS or Discover system will prompt you to
logout of your current school.
You are a site that uses Hosted FMS only and your users will need to
be setup manually.
You want to setup an additional Site administrator that does need to
exist as a user in SIMS or have access to SIMS.
You use SIMS ID Light to manage your office 365 / Google accounts
and you want to create a new user.
You are a SIMS Support unit and you want to create Support users.
The email address field is not mandatory. After the user has been created the user’s new password can be obtained from the Unclaimed Passwords list. |
You can administer SIMS ID users by CSV upload. This should not be
done if you can administer users automatically from within SIMS using
the SIMS People Service.
Login into SIMS ID
Click on the Users Tile
Click on the Manager Users Tile
If your login works across all the schools you manage select the
school you are dealing with otherwise skip this step.
Click the CSV
Import button
You can
download the correct csv template for the action you wish to undertake
This template will be pre-populated with the currently provisioned
users.
As this is personal data this should be handled securely.
Make the required changes to users.
New users can be added as new rows.
To delete a user set the status to ‘Disabled’ OR delete the row.
Upload the CSV using the upload function.
CAUTION – uploading a blank CSV will disable all CSV provisioned
users. Just as it would in OPENHIVE.
Accept the confirmation dialogue
Any errors will be displayed.
Once corrected you can re-upload.
A Success message is provided following a successful upload.
<
Once uploaded the changes will be processed by the system. How long
the changes will take to process will depend on the action being
undertaken and the services applied to the user. Some actions such as
O365 provisioning are reliant on Microsoft or other third parties.
You can only edit CSV provisioned users using the CSV method. Manually
provisioned users must be administered using the user interface. Users
provisioned automatically by SIMS must be administered in SIMS.
If you want to know how a user has been provisioned, you can find the
user in User Management and then select Manage next to the user
concerned
Then Click View Profile (you can also tell this is a UI created user
as you have the option to edit it in the context sensitive menu)
The highlighted section in the profile below shows this user was
created in the UI, it would say CSV Import if brought in by that
method etc.