Managing Google Integration
Managing Google users
Viewing my Google users.
Site Administrators can view users who have been allocated to Google by:
Logging into SIMS ID
Clicking on the Users Tile
Clicking on the User Management Tile.
You then need to click on the Google Tab
<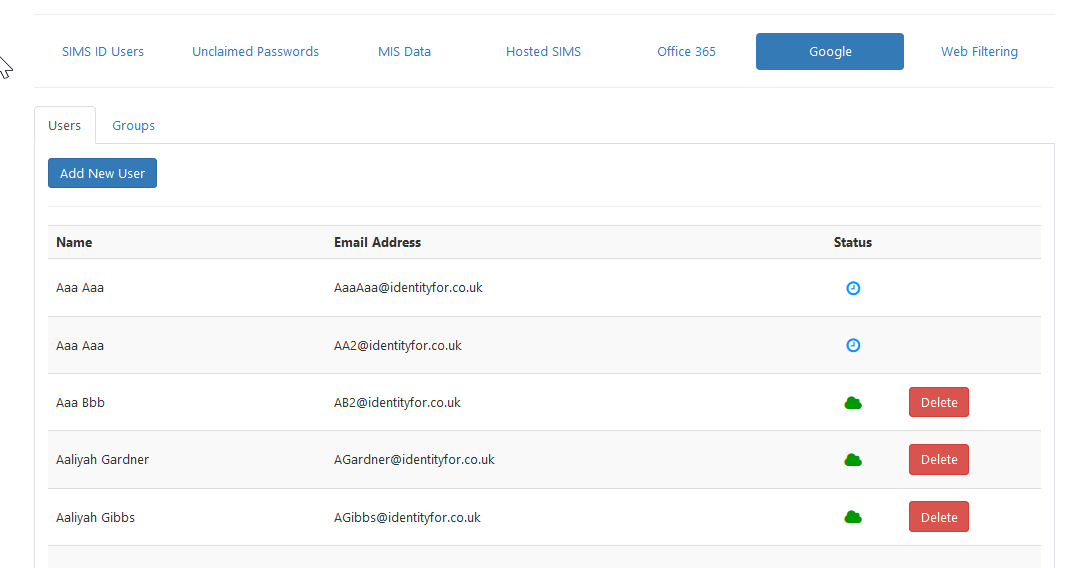
The resulting screen shows users that have been provisioned to Google.
These users have a Green Cloud
< when they have
successfully provisioned. Users that are still in the process of being
created in SIMS ID will have a Blue Cloud
Icon<
when they have
successfully provisioned. Users that are still in the process of being
created in SIMS ID will have a Blue Cloud
Icon< . If a user
has been added but has not started to provision a blue clock icon is
displayed<
. If a user
has been added but has not started to provision a blue clock icon is
displayed< .
.
Deleting users from Google.
If you wish to remove a user from Google then you can click the Red Delete Button next to the user you wish to delete.
You will then be presented with the following confirmation dialogue.
<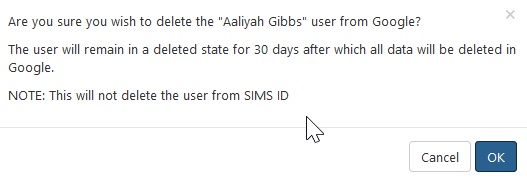
Please note the warning regarding the 30 day mail retention period.
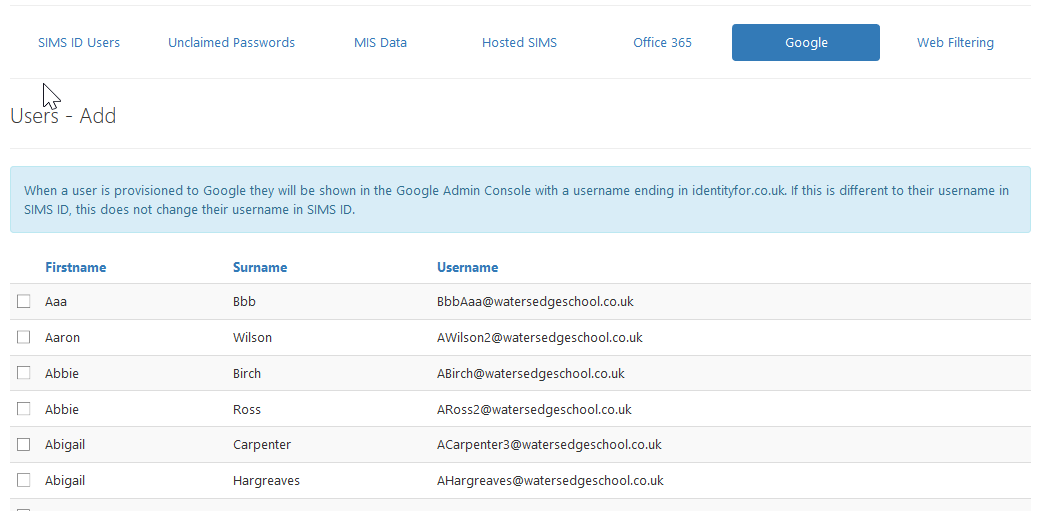
Adding users to Google
SIMS ID can automatically create users in Office 365 based on their user type. This setting is agreed at the time of installation. A further development to let Site Admins manage these rules is under development.
From the same screen you used to view current Office 365 users will be able to add other users that exist in SIMS ID to Office 365.
To do this click the Add New User button
<
You will then be presented with a screen showing all SIMS ID users that do not currently have a Google account.
<
<
Having ticked the users requiring a Google account click Save to start the provisioning process.
Once a user is added to the Google Service they will have the relevant Google tiles available to them on the Launch Screen. Until the provisioning process is complete these tiles will be greyed out and will not operate. When the provisioning process is complete these tiles will be available for use.
Managing Google Groups
SIMS ID manages your Google groups. These groups are used within Google products. These Groups are ‘Mail Enabled’ to allow them to act as distribution groups.
Viewing myManaging Google groups.
SiteTo Administrators can view users who have been allocated to Office 365
by:
Logging into SIMS ID
Clicking on the Users Tile
Clicking on the User Management Tile.
You then need to click on themanage Google Tabgroups and the Groups Tab.
<
Deleting Groups
To delete a groupplease use the Deletenew Button next to the group you wish to
delete. You will then need to Ok the confirmation dialogue.
<
From the same screen you used to view current Office 365 groups you will
be able to add newManage Groups andwithin allocate existing Google users to these
groups.
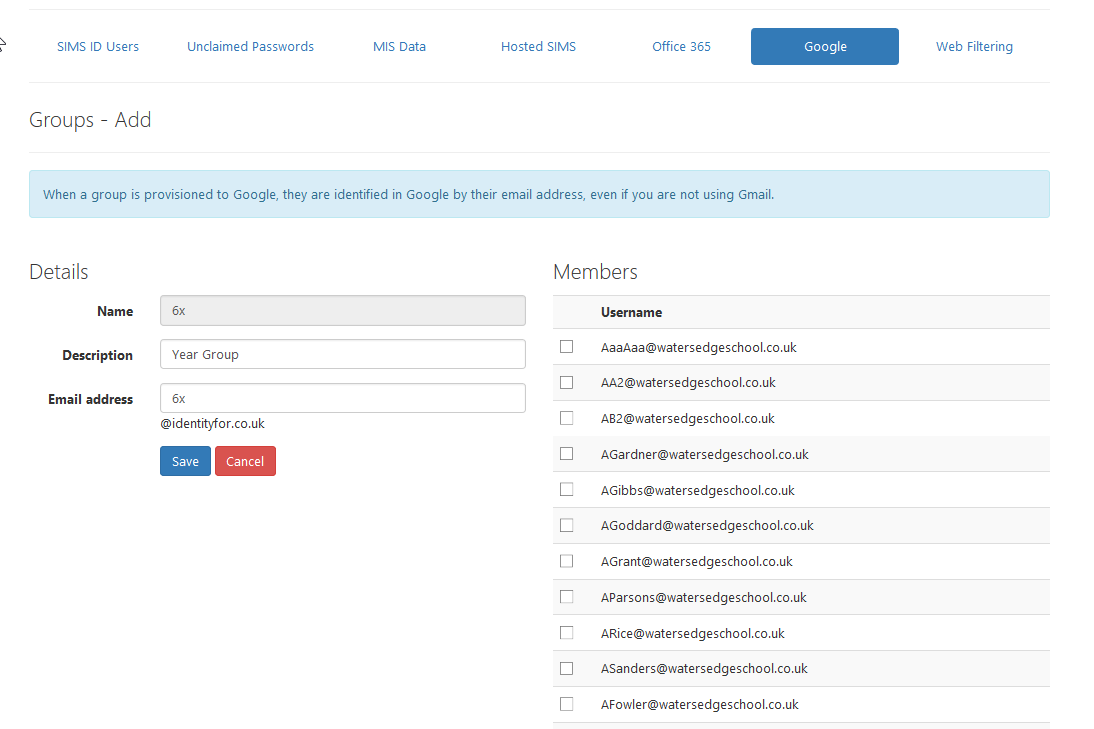
To do this click the Add New Group button
<
You will then be presented with a screen similar to the one below.
<
Add a Group name and Description and a Group email address. Place a tick
next to the users that should be a member of this group and click Save.
PreferencesEditing Groups
To edit a group use the Edit Button next to the group you wish to amend.
You will then be able to make changes to the group details and members.
<
Click Save to confirm you changes.
Approve Teachers for Google Classroom
When a teacher accesses Google Classroom, they have the option to add themselves as a teacher. This creates a pending request for the user to join the teacher-group, which needs to be approved.
To approve a pending request:
Log into your Google Tenancy as an admin, and access https://classroom.google.com/teacher-groupApprove or reject applicants to the teacher group as appropriate
Note: If you cannot access the http://classroom.google.com/teacher-group link, ensure the Google Groups for Business App is enabled in your Google Tenancy. functionality