My Profile
My profile overview
SIMS ID allows you to view your profile. This feature gives useful user information to help you keep track of your identity, maintain your account security, and set SIMS ID settings to manage your identity. This includes adding email addresses that you can use to log in with and/or send password resets to.
Accessing My Profile
The My Profile feature is accessible by clicking on Hello Your Name at the top right of the screen and selecting My profile from the menu
The My profile layout.
The My Profile section is split into a number of menu items

These are:
- General
- Login & Communications Preferences
- Security
Each section may have more than one option available within it.
General menu item
The General section shows information about your identity including your username, the sites you have access to, and details of your account activity within SIMS ID.
The General section has four tabs providing account information
The General page
This page shows basic information about your account
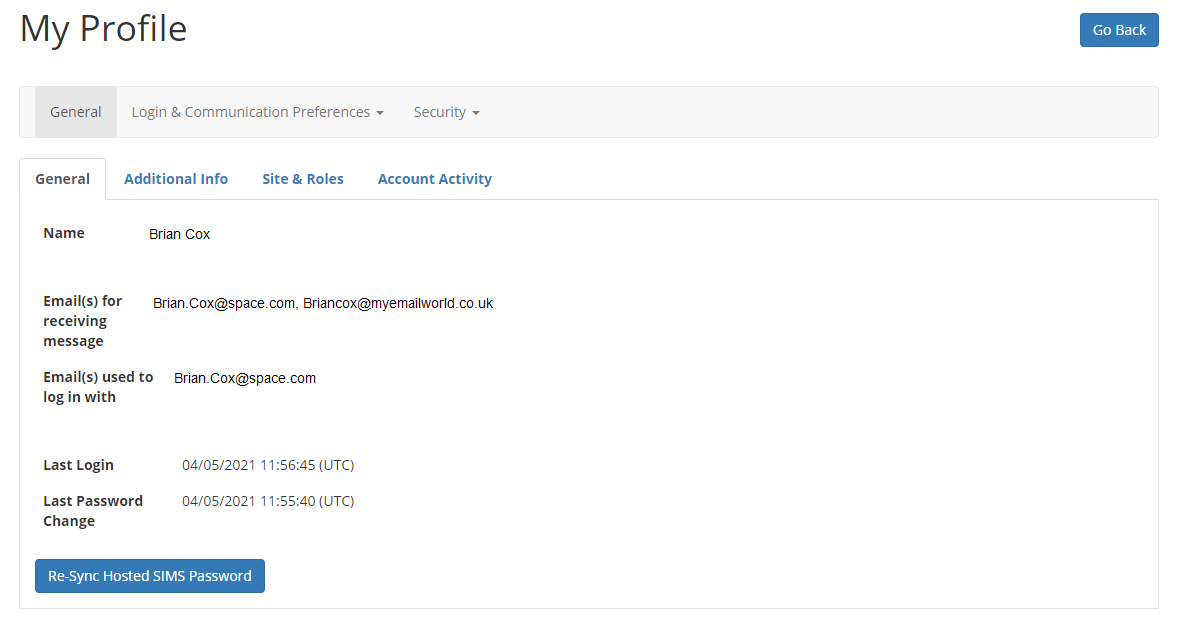
This includes the usernames you can log in with and what email addresses will receive password reset emails, should you ever forget your password.
You can see basic data on when you last logged in and when you last changed your password.
There is also a button that allows Hosted SIMS users to re-sync their password, this can be used to resolve problems logging into Hosted SIMS
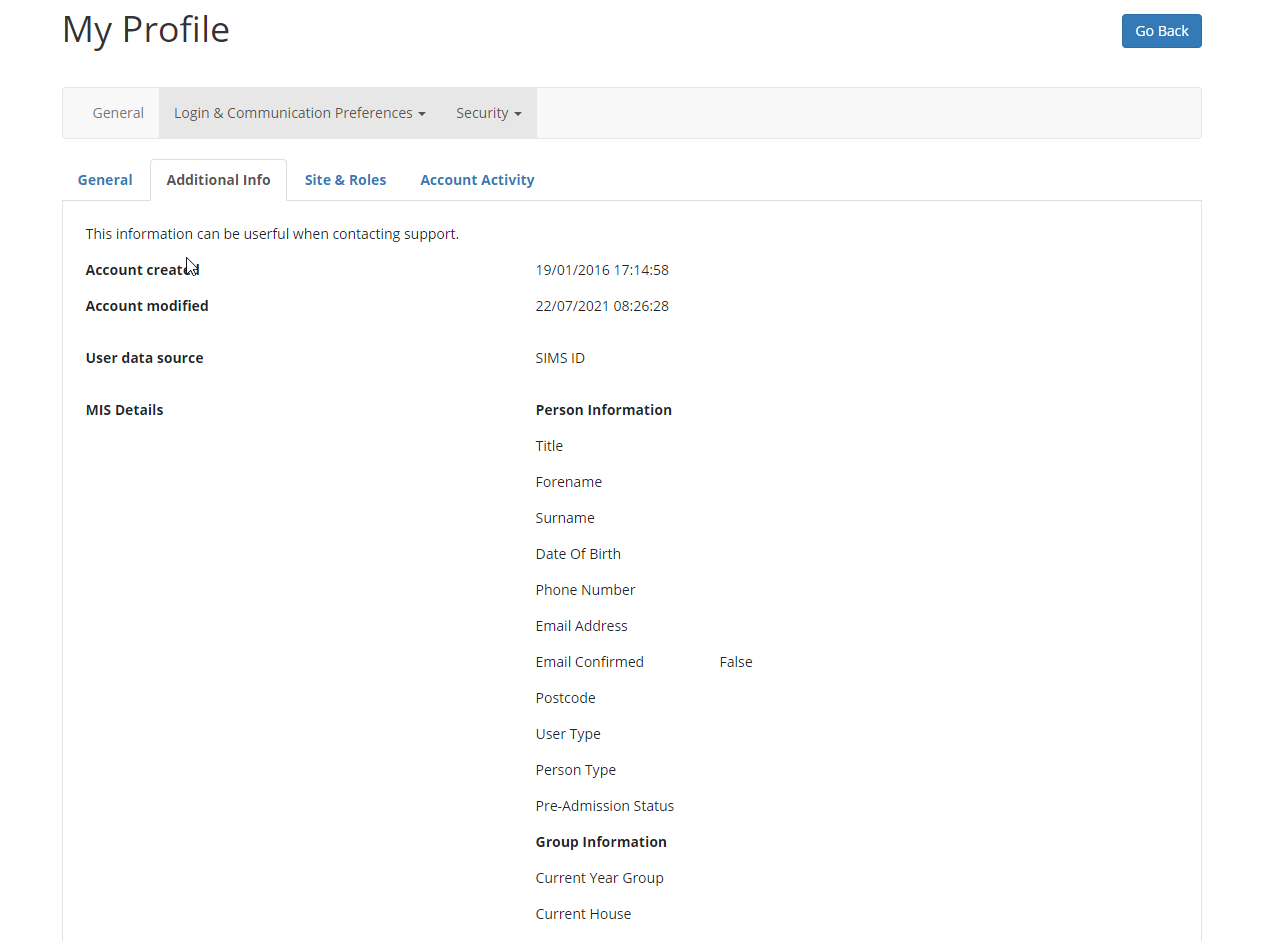
Additional Info
The Additional Info tab contains information that you may be asked to provide if you are dealing with the support desk. The amount of information on this tab depends on what services your account is used for. Some users will see basic information pulled from SIMS.
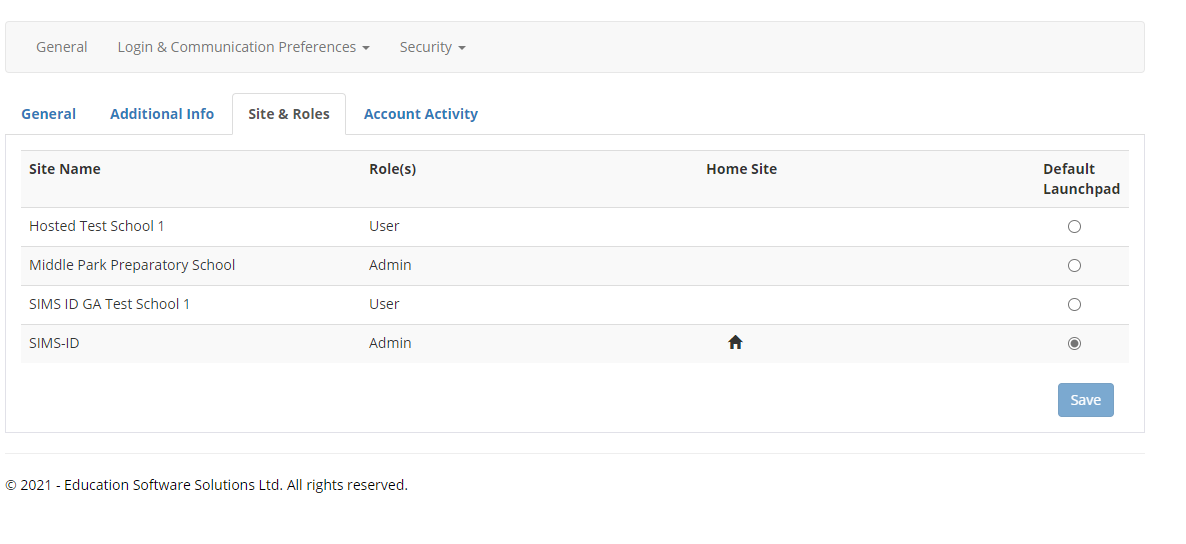
Sites & Roles
The Site & Roles screen shows which schools\sites you are a member of and what SIMS ID roles you hold at each site. This is important information if you access more than one site through SIMS ID
Account Activity
This tab shows you key security events that relate to your account.
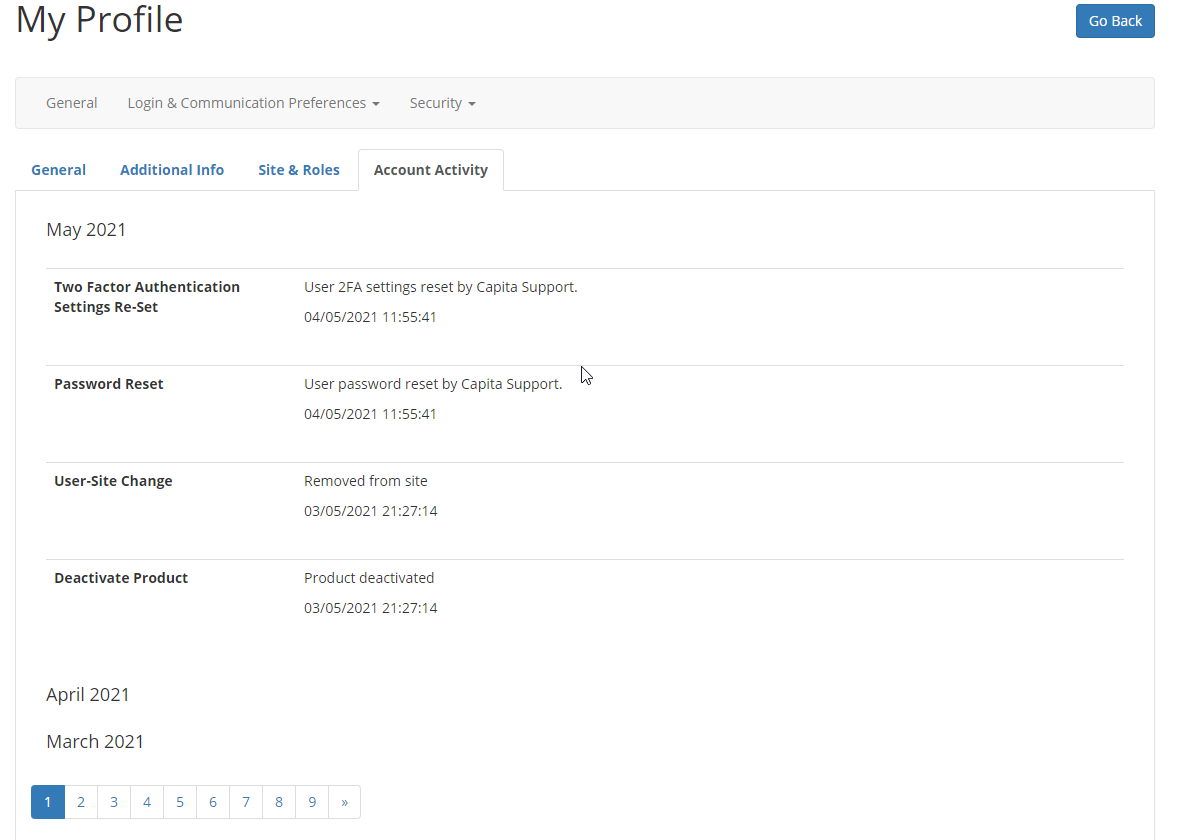
You can click on the month and year to reveal or hide any events in that month.
Login & Communications Preferences menu item
Clicking on Login & Communications Preferences allows you to manage your third-party logins (Parent users) and the email addresses you use to log in to SIMS ID or have the password reset emails sent to.
You can see from this menu what third-party logins you have linked to your account.
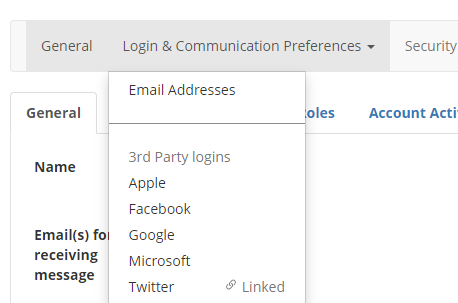
Email Address
Clicking on Email Addresses loads a screen where you can manage your email addresses associated with your account.
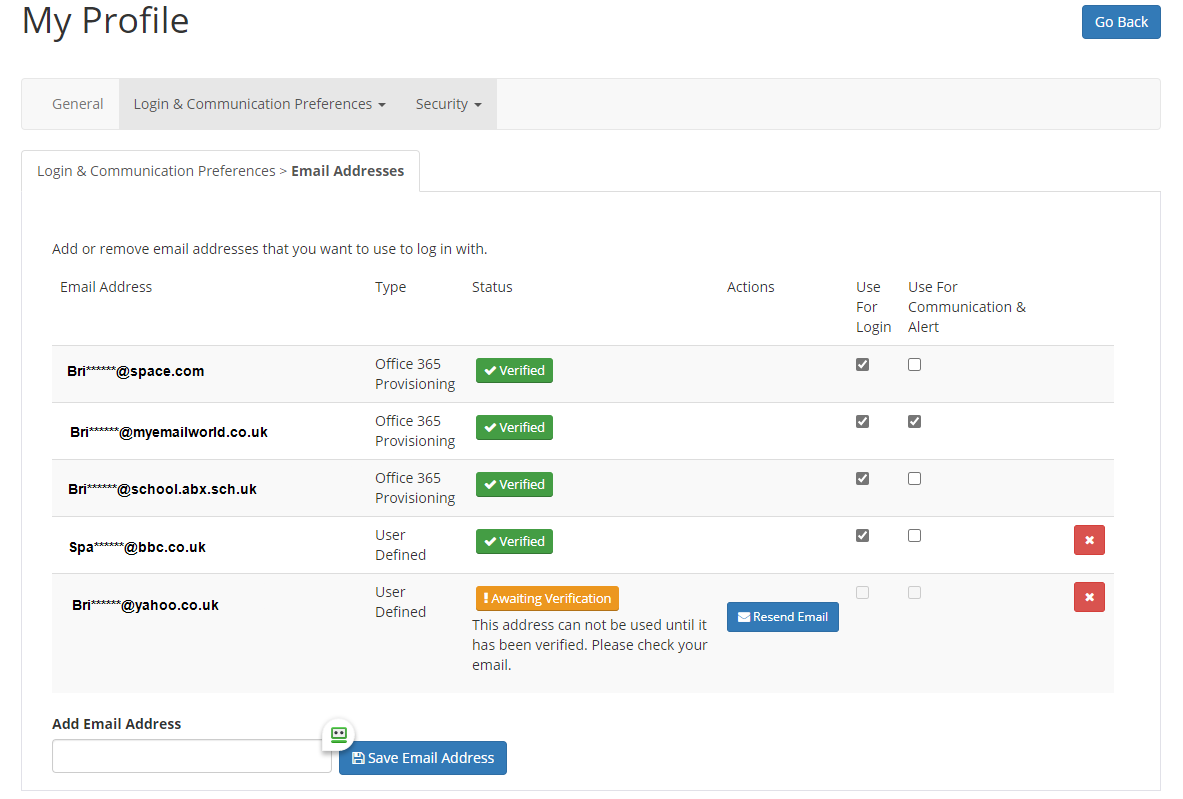
Here is where you can manage email addresses that you use to sign into SIMS ID and receive Communications and Alerts such as Password rests.
You can add new email addresses, remove ones no longer required, decide which are used for Logging into SIMS ID and receiving communications such as password reset emails.
Adding a new email address
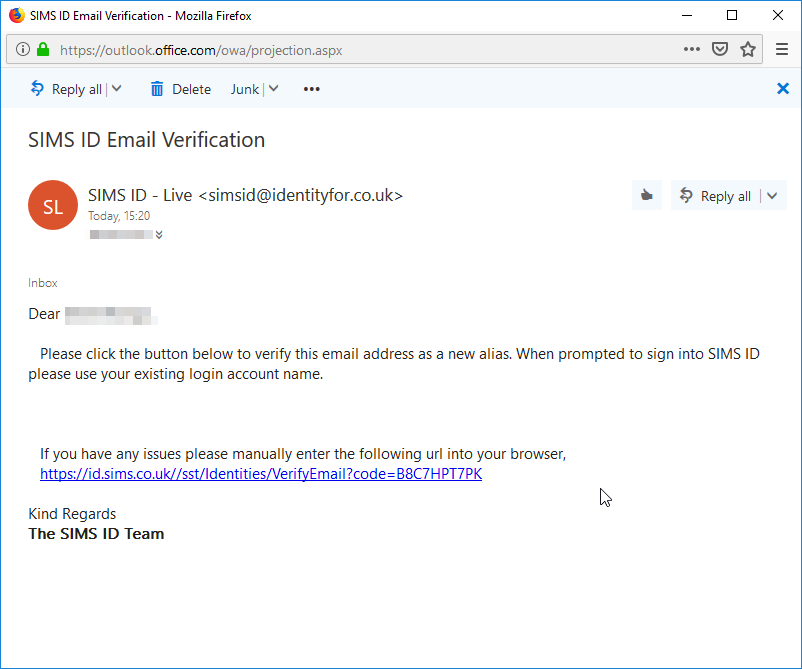
Enter a valid email address, that you have access to, that you wish to use in the Add Email Address box and click 'Save Email Address' a time-limited verification email will be sent to the email address used for your login alias.

Once you have entered this click on the "+" button and
Once you have received the email (you may need to check your junk folder) simply click on the verification link within the email. This will verify the email and you will be taken back to your profile page (if you have logged out or have timed out of SIMS ID you will be asked to login in during the verification process). Once you have verified the Alias you can choose to use it for logging in.
I did not receive the verification mail or it has timed out
If you do not receive an email or your verification email has expired navigate to Login & Communications Preferences>email addresses inside My Profile and click on the "Resend" option and you will receive a new verification email that will allow you to verify the email

Once the email address has been verified you will be able to tick the box next to it to allow it to be used for logging in to SIMS products.
Managing which email is used for log in and receiving communications
From the list of verified accounts, you will be able to toggle the ability to login with these as you wish and also which emails will receive communications. To do this simply tick or untick each setting.
Enabling an email address to receive communication will allow it to receive the following notifications: * Email based password reset messages should you forget your password or become locked out of your account * notifications about new browsers or devices are used to log in to SIMS ID * notifications when Passwords are changed or accounts are recovered * notifications when login events from abroad are detected.
Deleting email addresses
To remove an email address from your list click on the "Delete" button which is a white X on a red button, this will remove the account from use and it will no longer be a valid address and cannot be used to log into SIMS ID with.
If you want to use this email address again you will have to go through the verification process again for that alias.
Manging third Party Logins
Third-party logins allow you to use other identities such as your Twitter or Facebook account to log into SIMS Parent, SIMS Engagement, SIMS Student, SIMS Options, and Pay360 Education Payments (previously known as SIMS Pay)
From the Login & Communications Menu, you can click on each 3rd Party Login provider to either unlink (remove) an existing one or add a new one.
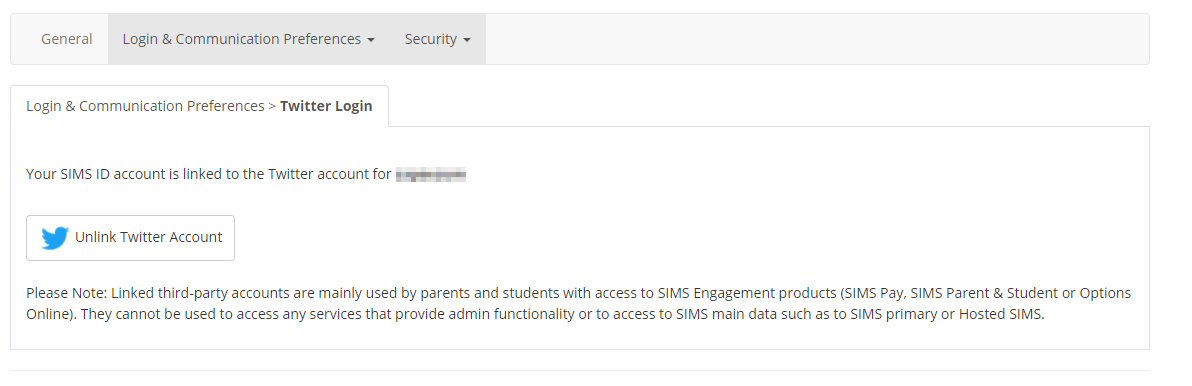
Unlinking a 3rd Party Login
To unlink a 3rd Party Login click on a liked provider such as Twitter in the screenshot above.
This will load a screen where you can unlink that 3rd Party Login.
Adding a 3rd Party Login
To add a 3rd Party Login click on a provider that is not currently linked such as Facebook in the screenshot above.
This will load a screen where you can link that 3rd Party Login.

Each provider is slightly different so please follow the onscreen instructions.
Security menu item
The Security Menu Allows you to: * change your password * Manage your security questions, uses to recover a forgotten password if you are not able to receive an email-based password reset. * Manage your two-factor (multifactor) authentication options for increased account security
Change Password
Please click on the link below to be re-directed to the Change Your Password Support Page. Change your password
Manage Security Questions.
This page displays Three drop-down menus, where you can select the Security Question you wish and then a field where you can enter your answer.
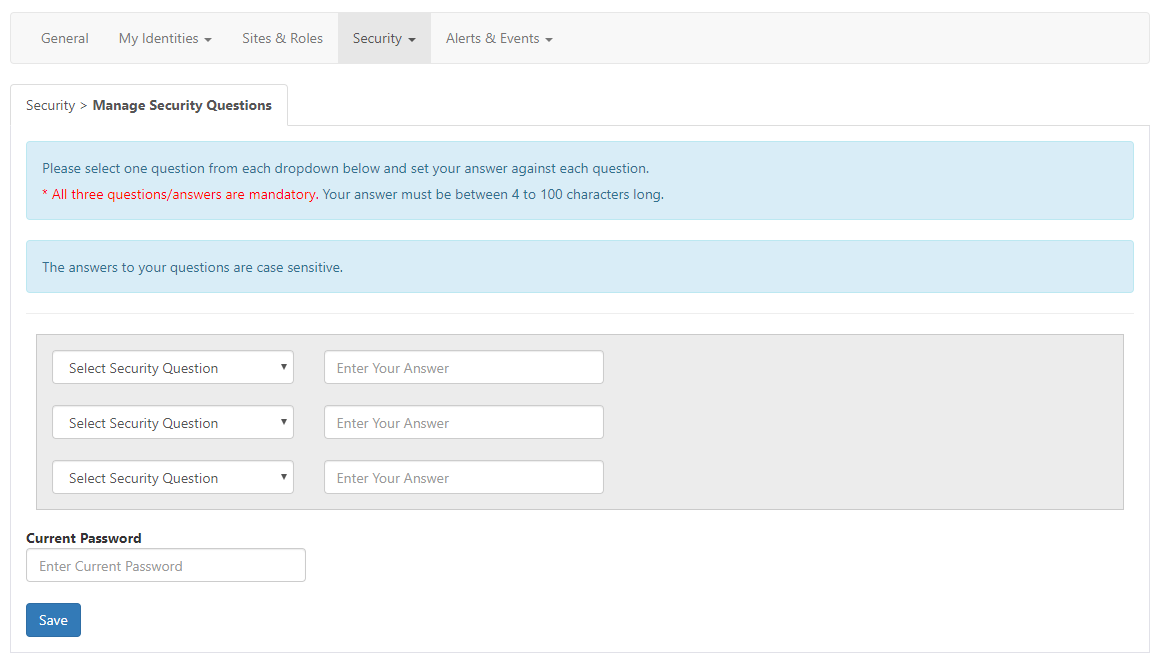
This is so when you select the Forgotten Password link on the Login Page and pass the security check, you can select the option to reset your password using one of the three security questions you have set here.
Manage 2 Factor Authentication.
This tab allows you to manage your Two Factor Authentication. This will appear depending on if the Site Administrator has this set up for your site.

Once you have selected the Manage Two Factor Auth button the page will now display your two options. You can have one set up depending on your Preference.
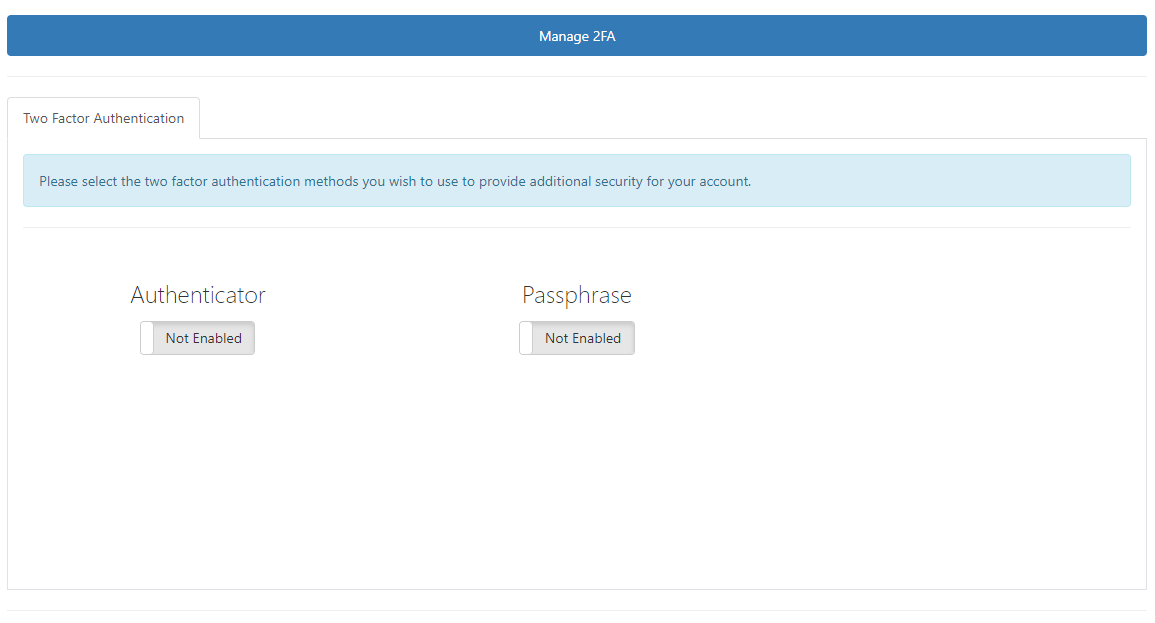
Passphrase Option.
If you choose to select the Passphrase option, you will be asked to set a simple Passphrase that’s Alphanumeric only.

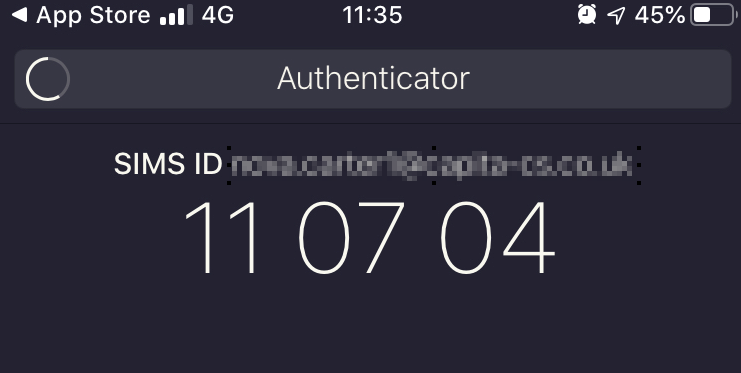
Authenticator.
If you choose the Authenticator, you will need your mobile device as this involves the authenticator app. You can download the app from your App store.
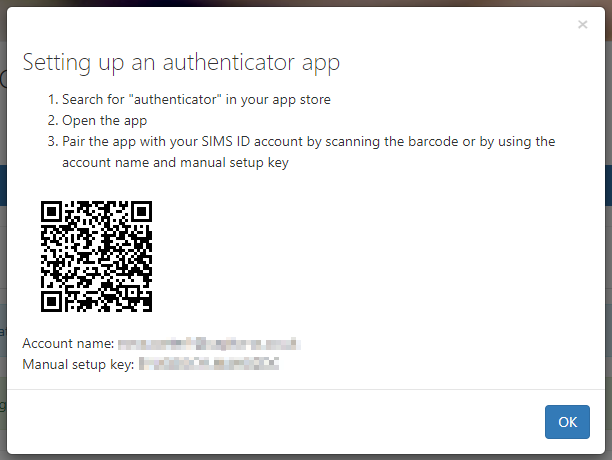
Once you have followed this step, your SIMS ID account will be displayed using your login name and a 6-digit code, this is the code you enter when login into SIMS ID. It changes every 30 seconds so no code is the same.