O365
Managing Office365 Integration
Managing Office 365 users
Viewing my Office 365 users.
Site Administrators can view users who have been allocated to Office 365 by:
Logging into SIMS ID
Clicking on the Users Tile
Clicking on the User Management Tile.
You then need to click on the Office 365 Tab
<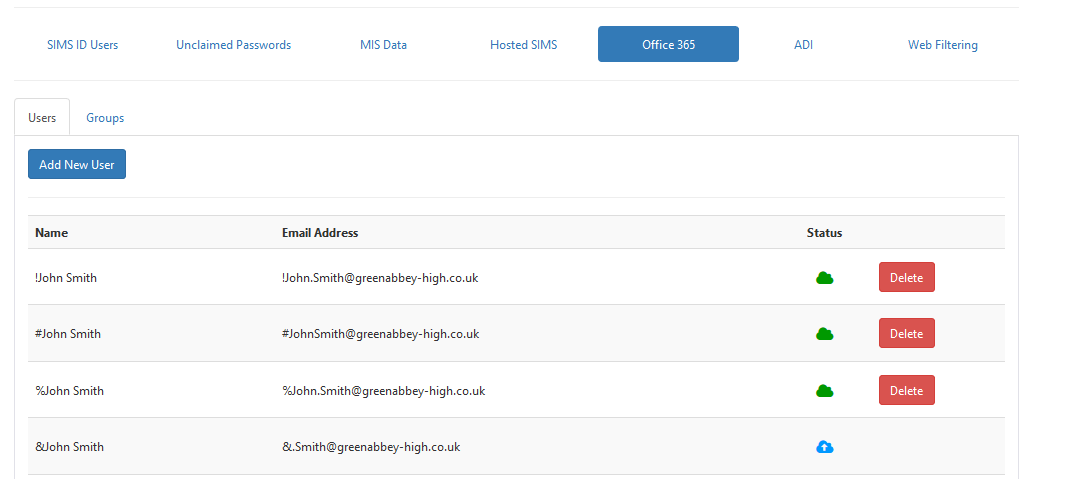
The resulting screen shows users that have been provisioned to Office
365. These users have a Green Cloud
< when they have
successfully provisioned. Users that are still in the process of being
created in SIMS ID will have a Blue Cloud
Icon<
when they have
successfully provisioned. Users that are still in the process of being
created in SIMS ID will have a Blue Cloud
Icon< If a user
has been added but has not started to provision a blue clock icon is
displayed<
If a user
has been added but has not started to provision a blue clock icon is
displayed<
Deleting users from Office 365.
If you wish to remove a user from Office 365 then you can click the Red Delete Button next to the user you wish to delete.
You will then be presented with the following confirmation dialogue.
<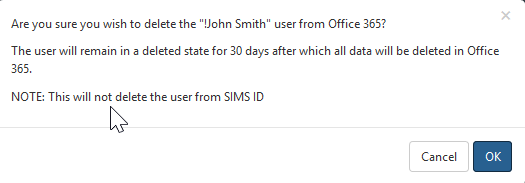
Please note the warning regarding the 30 day mail retention period.
Adding users to Office 365
SIMS ID can automatically create users in Office 365 based on their user type. This setting is agreed at the time of installation. A further development to let Site Admins manage these rules is under development.
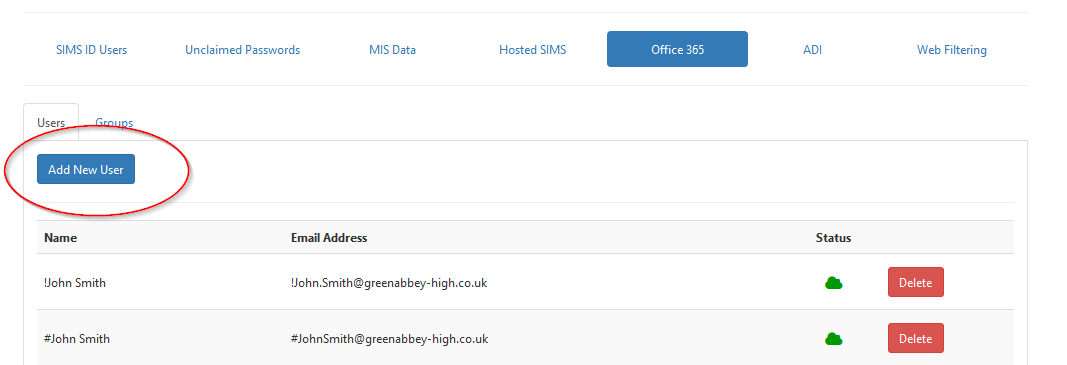
From the same screen, you used to view current Office 365 users will be able to add other users that exist in SIMS ID to Office 365.
To do this click the Add New User button
<
You will then be presented with a screen showing all SIMS ID users that do not currently have an Office 365 account.
<
<
Having ticked the users requiring an Office 365 account click Save to start the provisioning process.
Once a user is added to the Office 365 Service they will have the relevant Office 365 tiles available to them on the Launch Screen. Until the provisioning process is complete these tiles will be greyed out and will not operate. When the provisioning process is complete these tiles will be available for use.
Resyncing Your Office 365 Users
Sometimes during the Office 365, provisioning process, a user is created successfully, however, due to the time taken to complete this action they might not be flagged with the correct sync status (blue clock/grey cloud) and this may cause issues with any of the Office 365 tiles in SIMS ID.
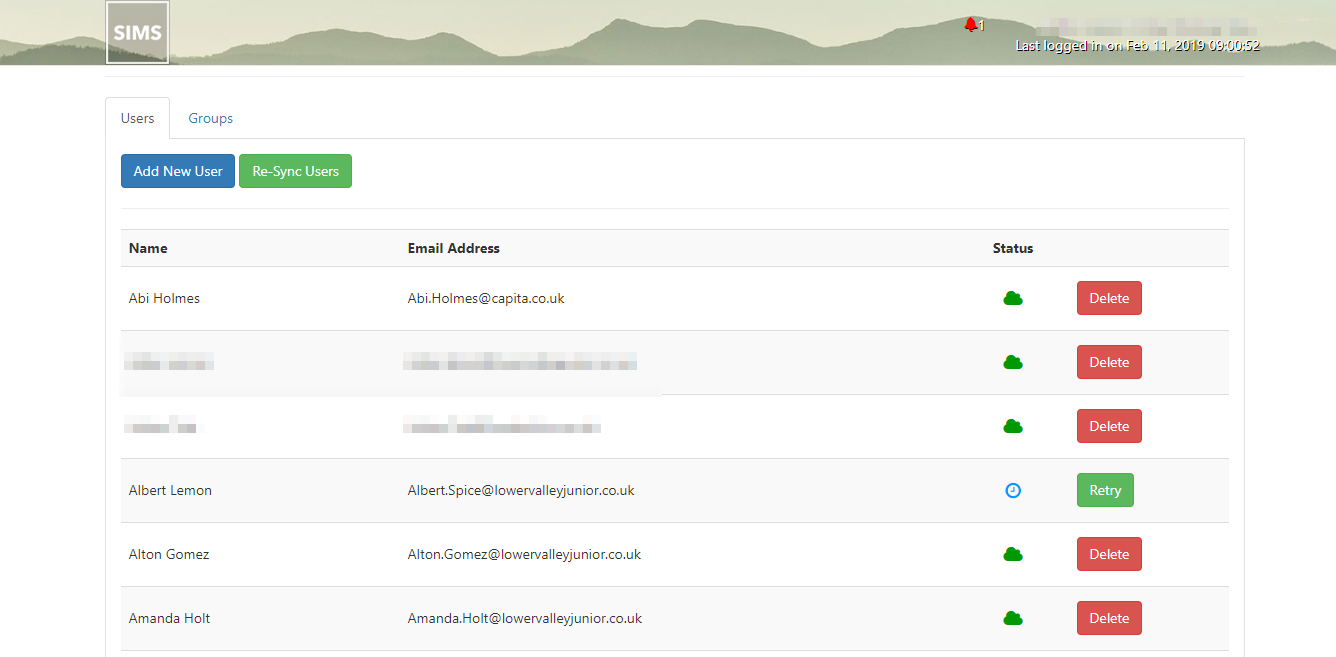
The resync feature can check the status of the user and correct the sync status. Using this feature forces a resync of one or more users that will make sure the flag between Office 365 and SIMS ID is correct
To do this for a single user simply find the desired user within the user list and click on the "Retry" button and confirm that you wish to start the resync process, if this is successful the user will be updated and flagged as synced (green cloud)
For bulk user click on the "Resync Users" this will open a user select popup within the page where you will be able to select and deselect the users you wish to resync
Please Note: all users in the list are select by default when you attempt to do a bulk resync
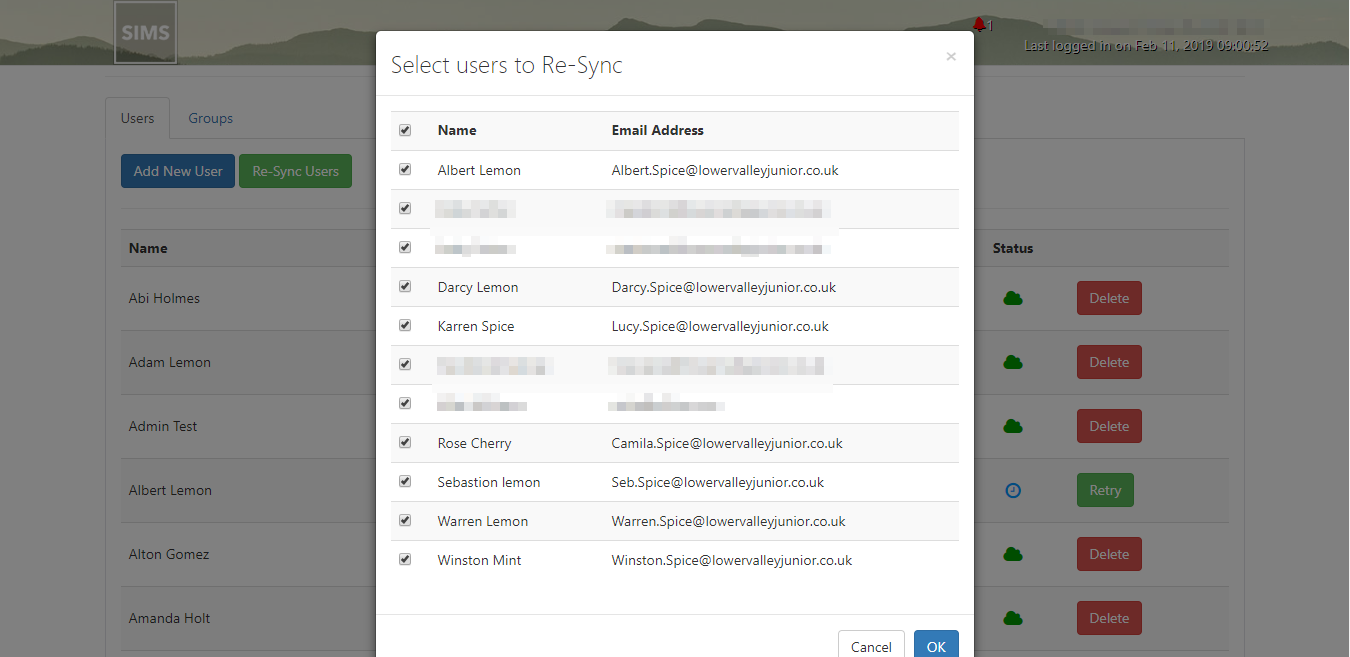
Once you have selected the users you want to resync click on the confirmation button and the resync process will start for the chosen users
Managing Office 365 Groups
SIMS ID manages your Office 365 groups using the new Manage Groups within Preferences functionality